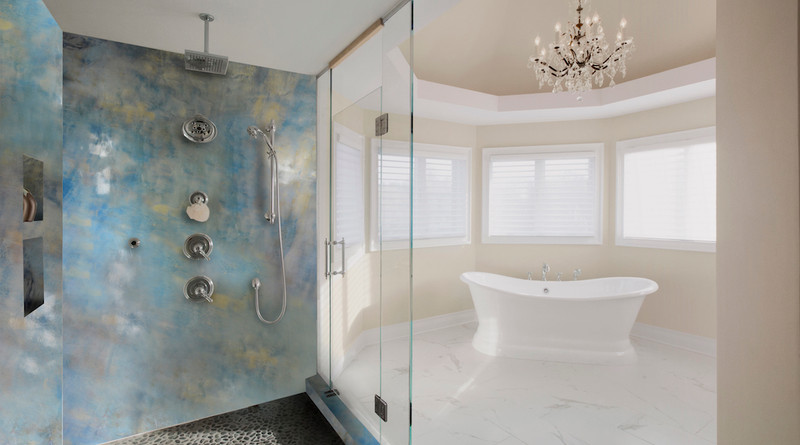
Let’s face it, DIY bathroom remodel projects are not a typical project you can complete in one weekend. When you factor in the demolition, installation, and clean up, these projects can take weeks. Imagine if you can remove one step from your project how much time that would save? Epoxy can be applied over the majority of surfaces, eliminating the need for demolition which cuts your project time in half!
At Countertop Epoxy we have developed different epoxy solutions that give you the beauty of natural stone while being UV resistant, stain resistant, and long lasting. This epoxy is ideal for floors, showers, tub surrounds, backsplashes, countertops, and so much more. Here are three projects that you can easily complete in a weekend using epoxy.
Project One: Epoxy Shower
An epoxy shower or tub surround is a low maintenance solution for your weekend bathroom remodel. The benefits of using epoxy is that you will have no grout lines due to the seamless application and it is water resistant. The epoxy can be applied over existing formica, laminate, concrete, granite, marble, ceramic, porcelain, tile, plywood, and MDF/MDX. Virtually any surface can be coated!
Prepare the area you would like to cover by making sure it is clean and dry. Be sure to tape off any areas you do not want to be epoxied carefully as well as taping a plastic drop cloth to catch drips.
For the epoxy first pour hardener into a bucket of resin. Then add in one of our FX Metallic Color, this will then be mixed for at least 3 minutes, make sure to scrape the edges and bottom of the bucket to ensure no sticky spots.
Your prep is done and it is time to trowel the product on the wall! Your base coat can be added with a textured finish or smooth depending upon your preference. Once this base coat is applied you can add a second color using the trowel or you can spray FX Metallic Powders on the wall using the instructions on the bottle. To finish the wall use a trowel to add texture and mix the colors.
Read more about the FX Metallic Wall product.
Project Two: Epoxy Floor
In the majority of bathrooms, you should be able to refinish your floor with epoxy without removing the floor to build off of the sub floor. The materials you can refinish include, formica, tile, concrete, wood, marble, laminate, vinyl, linoleum, and plywood.
We recommend that you read the detailed step-by-step instructions before installing your epoxy floor. The first step is to clean the floor and spend time caulking and taping off any plumbing, registers, and baseboards. Once that is finished, you can mix and pour the flood coat of epoxy. Make sure to evenly coat the edges of the room first and then using a squeegee spread the product. It is very important that you pour all of the mixed epoxy onto the floor as it cures faster if left in the bucket. After you have poured the epoxy you have 30 minutes to 1 hour before the products starts to cure. This allows you time to spread the product evenly.
Once the flood coat has been applied you can spray accent colors using one of our FX Metallic Powders mixed well with 91% isopropyl alcohol. After you are satisfied with your floor you will spray clear isopropyl over the top to help level and release air bubbles.
It is imperative to wait 48 hours before walking on the floor, and longer before placing heavy objects on the floor. The epoxy does take 30 days to cure to full hardness.
Read more about the FX Flooring Epoxy.
Project Three: Epoxy Countertop
Your existing countertop can be easily refinished using epoxy and it is usable in 36 hours after applying the product. This is an area where you can create a natural stone look that is more durable and stain resistant than natural stone would be.
Before starting an epoxy countertop installation we recommend reading our step-by-step instructions. The overall process starts with a clean surface that is well taped and masked to protect the surfaces that you don’t want to refinish. Once the area is clean you will paint the countertop with the FX Prime Coat which needs to dry for 4 hours before pouring the epoxy. After mixing your epoxy carefully you will apply the flood coat to the countertop. After the flood coat has been applied you will torch the surface with a propane torch or heat gun to release any air bubbles that may have occurred.
At this stage you can start creating veins, marbling, or granular effects with accent colors. Once you are satisfied with the appearance, you will leave your countertop for 2-3 hours before removing drips from the bottom edge with a putty knife. Once there are no further drips you can begin removing the masking and cleaning up the area. You can use the countertop in 36 hours although we recommend not placing heavy objects on top. Like concrete, your countertop will take 30 days to completely cure and reach full hardness.
Read more about our ULTRA UV 500F Premium FX Poxy.
Before you start your project, please call one of our installers at 970.628.1846 as they can talk you through the logistics of using epoxy in your project.

