Download Instructions
Tools required:
 Large mixing containers Smaller mixing containers for accent colors if desired Spray bottles (one with just isopropyl alcohol; additional accent colors should have their own) Temperature gun aka Infrared gun Mixing sticks Power Drill and plastic paddle mixers (for 2+ gallon mixtures) Chip Paint Brushes (if working with textured or live edge wood) Soft Wire brush (for live edge wood slabs) Disposable nitrile gloves Tape & Drape Box of Rags Mold Release Spray Melamine board and panels (if building your own mold) Silicone Caulking Foil tape Mylar tape (or any type of non-stick Tyvex style tape) 99% Isopropyl Alcohol Wood Clamps and weights (if you are building your own mold and have inserts that need held down) A timer of some sort Fire extinguisher… just in case!
Key Terms:
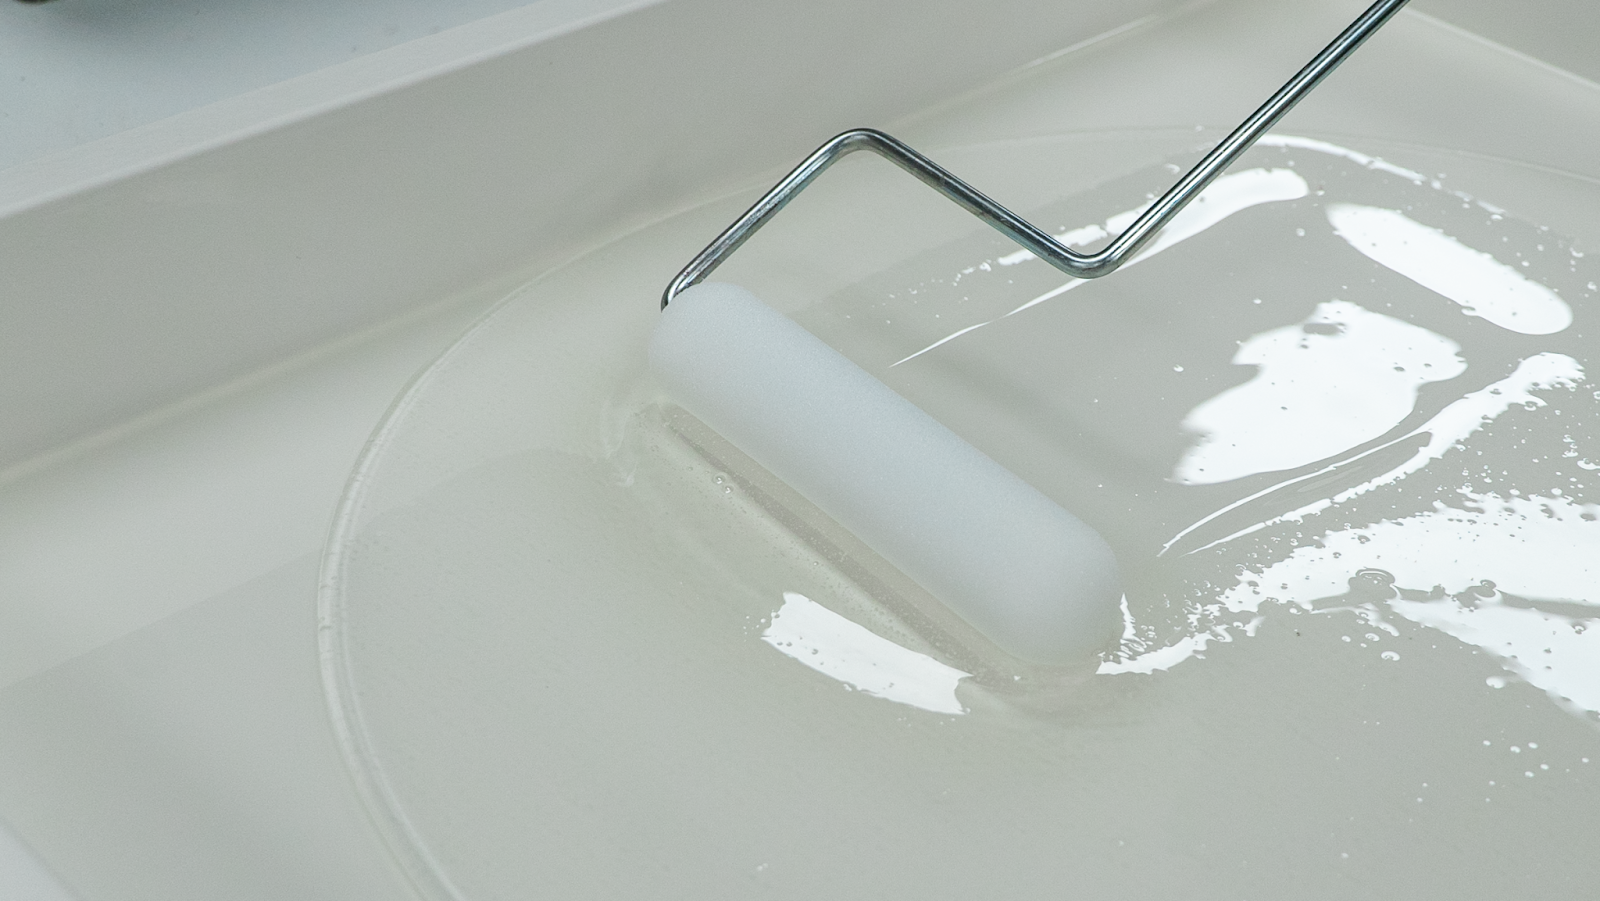
Skim coat - A thin application of clear epoxy used to seal a porous substrate. Skim coats are often referred to as ‘seal coats,’ they are one in the same.
Flood coat - The thick aesthetic epoxy pour that is poured out onto your substrate; clear or colored.
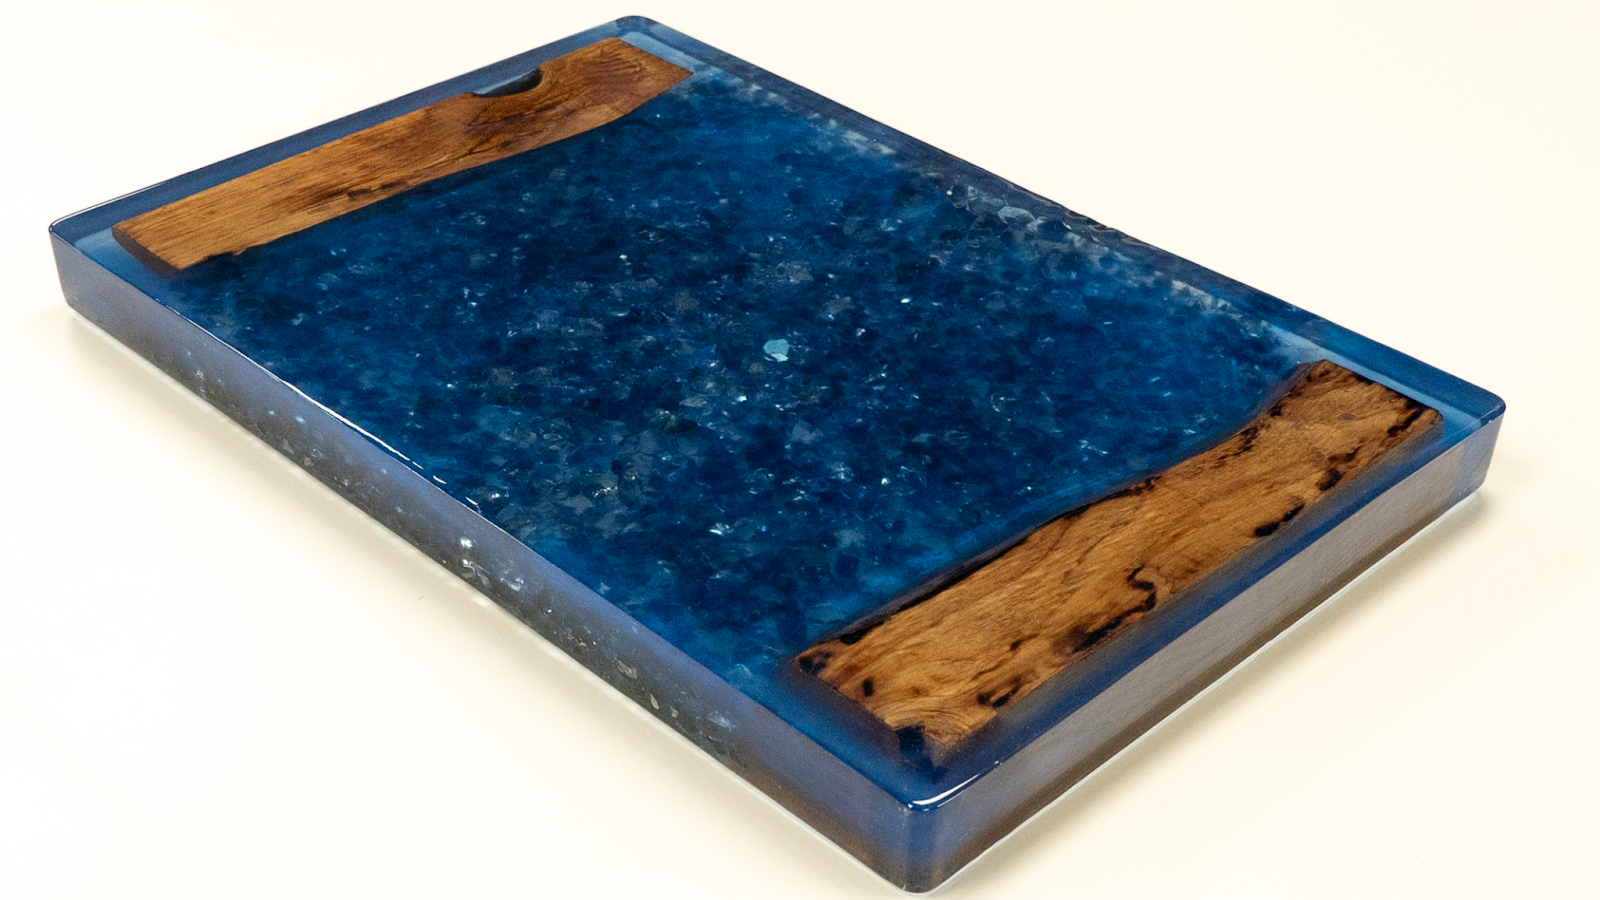
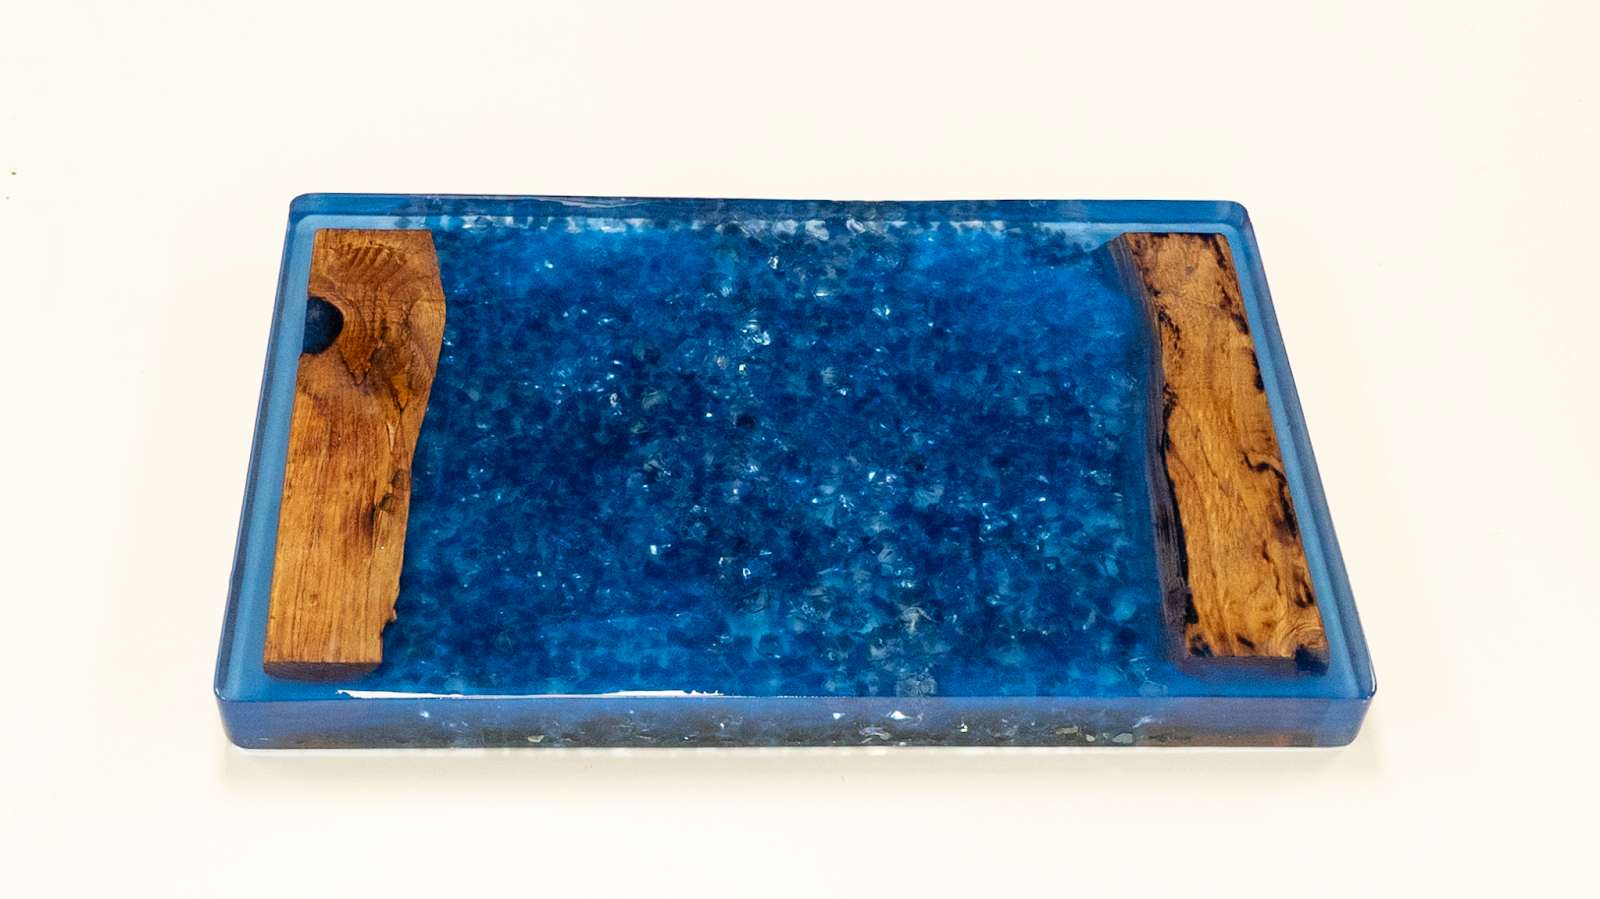
River Table - A table with a strip of epoxy from end to end. The epoxy strip can be in the middle with wooden slabs on the sides or vice versa; or it can be half wood on one side and half epoxy on the other side.
Casting Table - A table primarily consisting of casting epoxy. Usually people insert objects inside throughout (ex: flowers, beer caps, pennies, precious stones, plastic figurines, LED lights, ect).
Exotherm - When deep pour projects increase in temperature and are left untreated resulting in the epoxy overheating to the point where it can yellow from burns and potentially crack itself.
Bear in mind temperatures
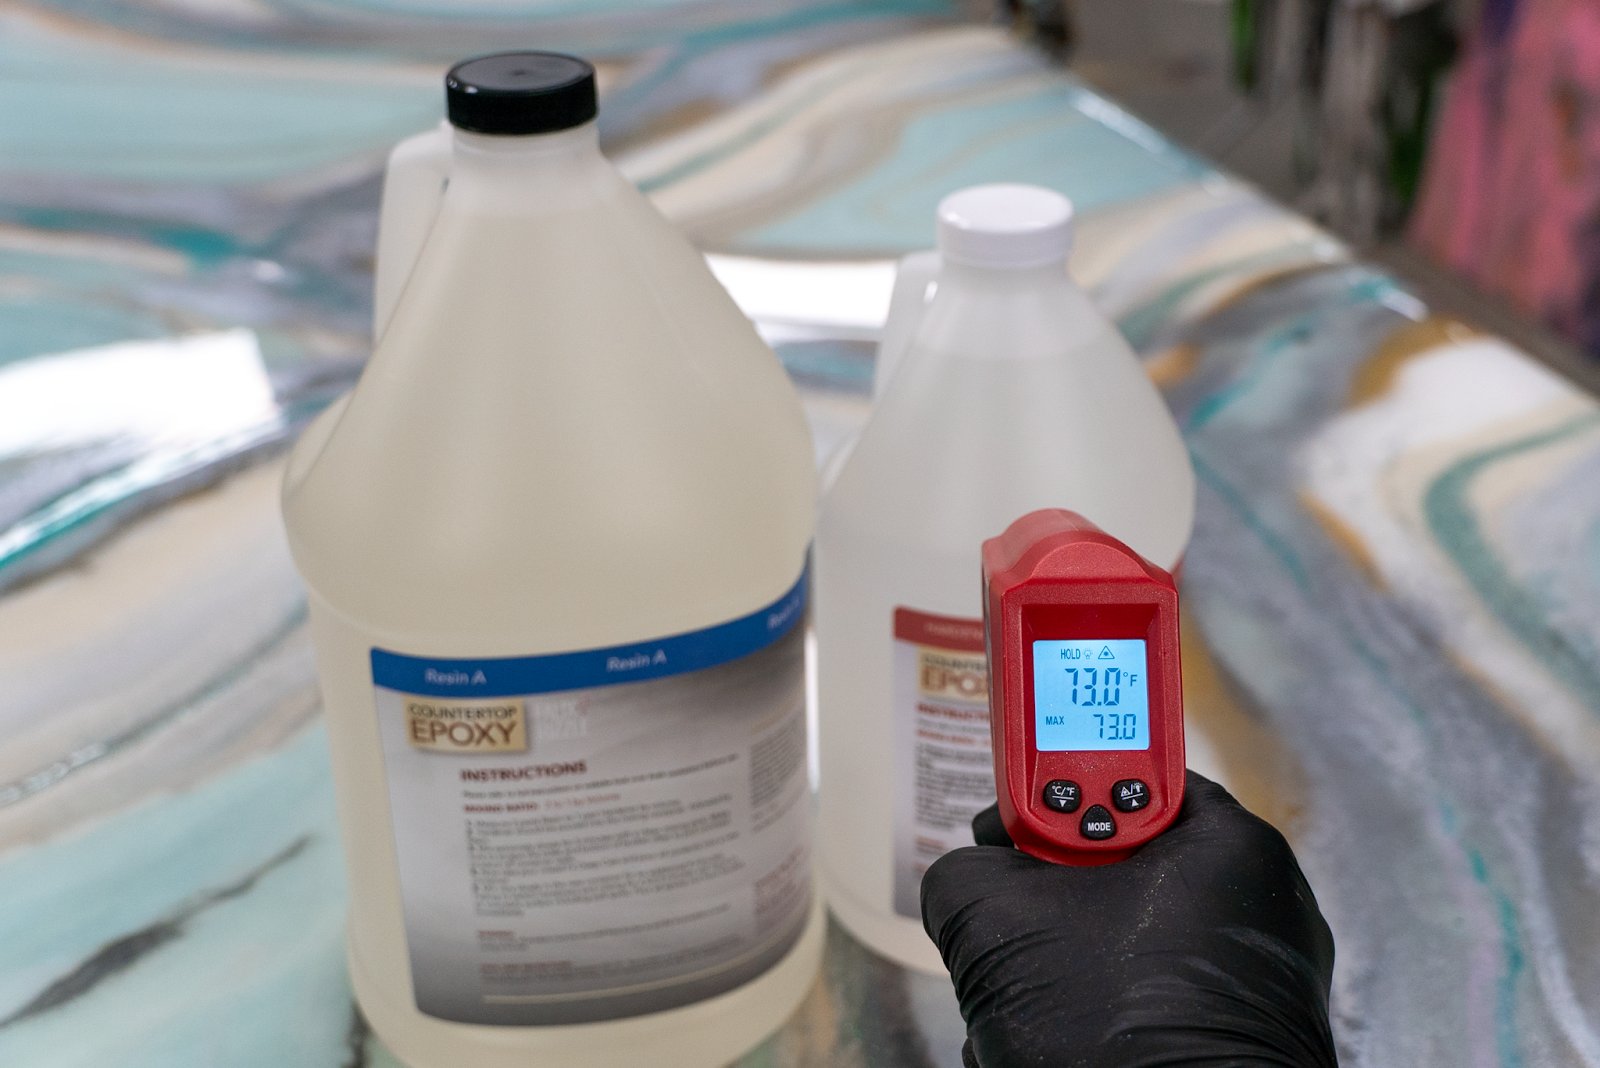
Temperatures matter! Start by ensuring that the ambient temperature of the room is in the goldilocks temperature zone between 70°-75° degrees Fahrenheit (21°-24° celcius). We advise the room be at this setting for about 24 before and several days after as the product begins its slow curing process.
Product temperatures can drastically vary during transit throughout certain times of the year. With our infrared Temperature gun, temp your epoxy to ensure it is in the goldilocks temperature zone as well. Do not assume that because it has sat in the same room for a couple hours that it will be the same temperature. Epoxy is of a thicker consistency than water and can take time to acclimate to its surroundings. If the epoxy sits along a furnace or cold wall - this can drastically affect the performance of the epoxy.
-
We do not recommend any type of temperature acclimating methods - let it adjust naturally.
-
Lower temperatures below 70° can result in a softer cure with an extended cure time.
-
Higher temperatures above 75° can result in the epoxy setting up quicker thus cutting back on your working time and making it difficult for the epoxy to evenly level itself.
Declutter the working area. Shut off any airflow. Limit traffic in the area in order to prevent debris from landing in your project. Clean your substrate with household cleaning products free from oil or water. Isopropyl alcohol works just fine.
There are two types of molds:
-
A fabricated store bought mold:
Often these molds are silicone or plastic. The likelihood of there being edges in which the epoxy can leak out are unlikely so simply mask off the area in which you will be conducting your pour in order to protect furniture and floors. -
One that you build yourself:
We typically use Melamine boards when building a table mold. Melamine boards have a slick plastic coating that detaches a little easier once you are ready to deconstruct your mold. After your mold is built, consider installing wood clamps to keep your edges tightly together to help eliminate epoxy loss. Apply a thin bead of silicone caulking along those edges followed by your finger to push that product into any potential crevices. We don't want excess caulking left on the horizontal or vertical panels. Apply foil tape to the exterior part of the mold on any angles where the panels join. This will act as an additional barrier to help prevent epoxy loss. Lastly, spray a thin coating of mold release throughout the surfaces of the melanin board/panels.
-
Epoxies in general have a hard time adhering to silicone hence why we use it for this application.
-
Consider using a more high end durable foil tape for projects holding multiple gallons of epoxy.
Mask off the flooring area in case a leak takes place during your pour. Make sure there is more than enough masking on the surrounding floor where you will be moving around as you may accidentally step on a dripping and spread it around without realizing it.
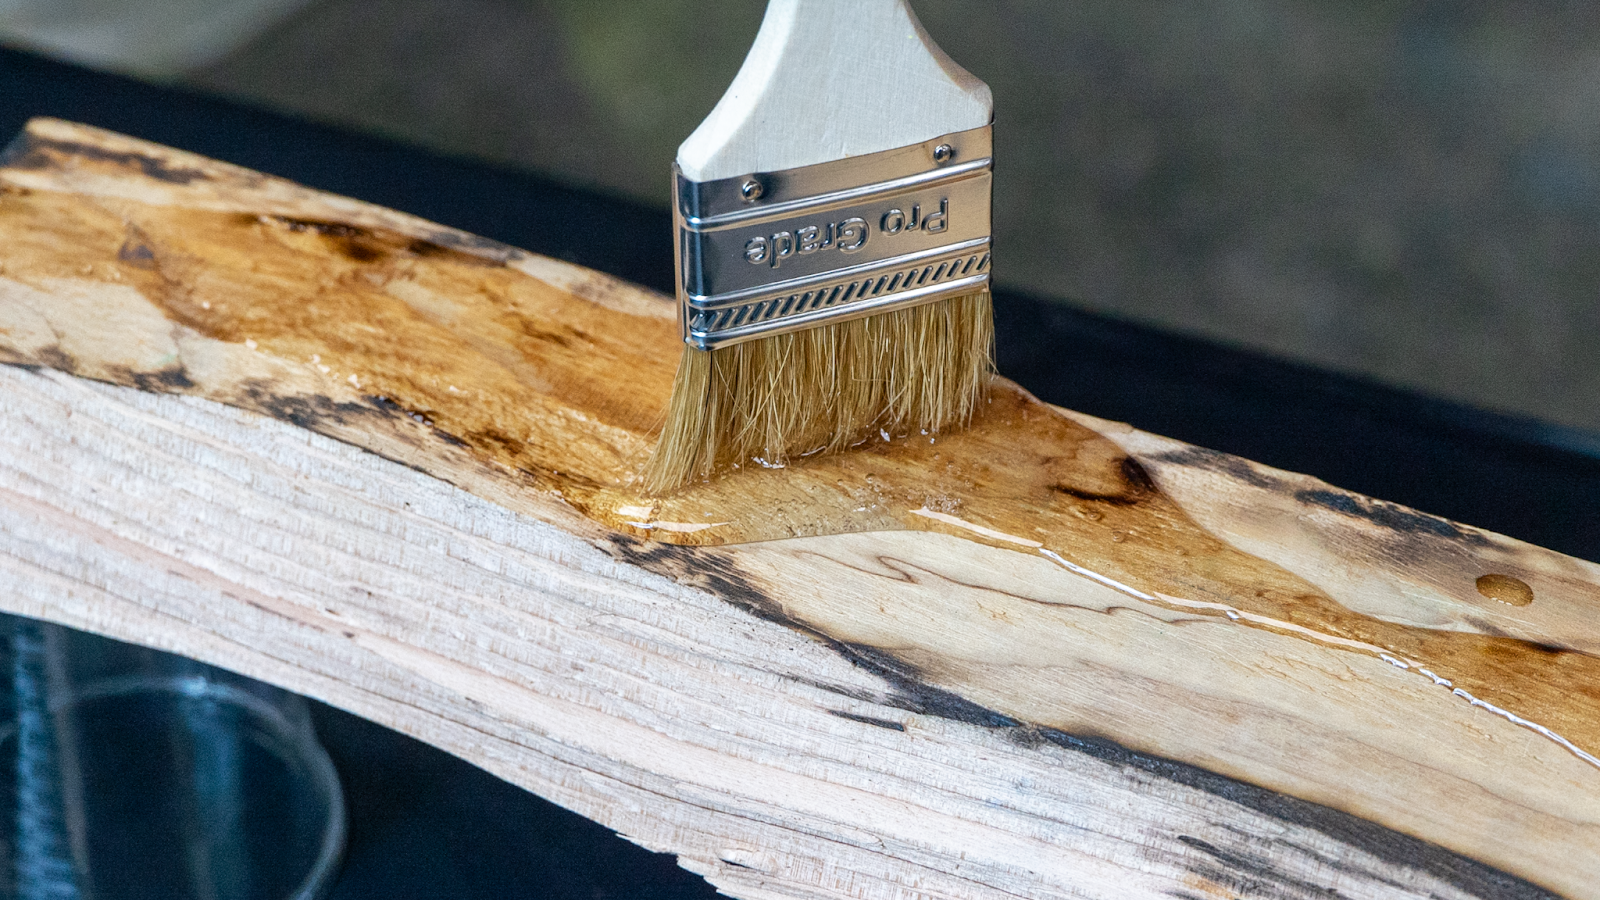
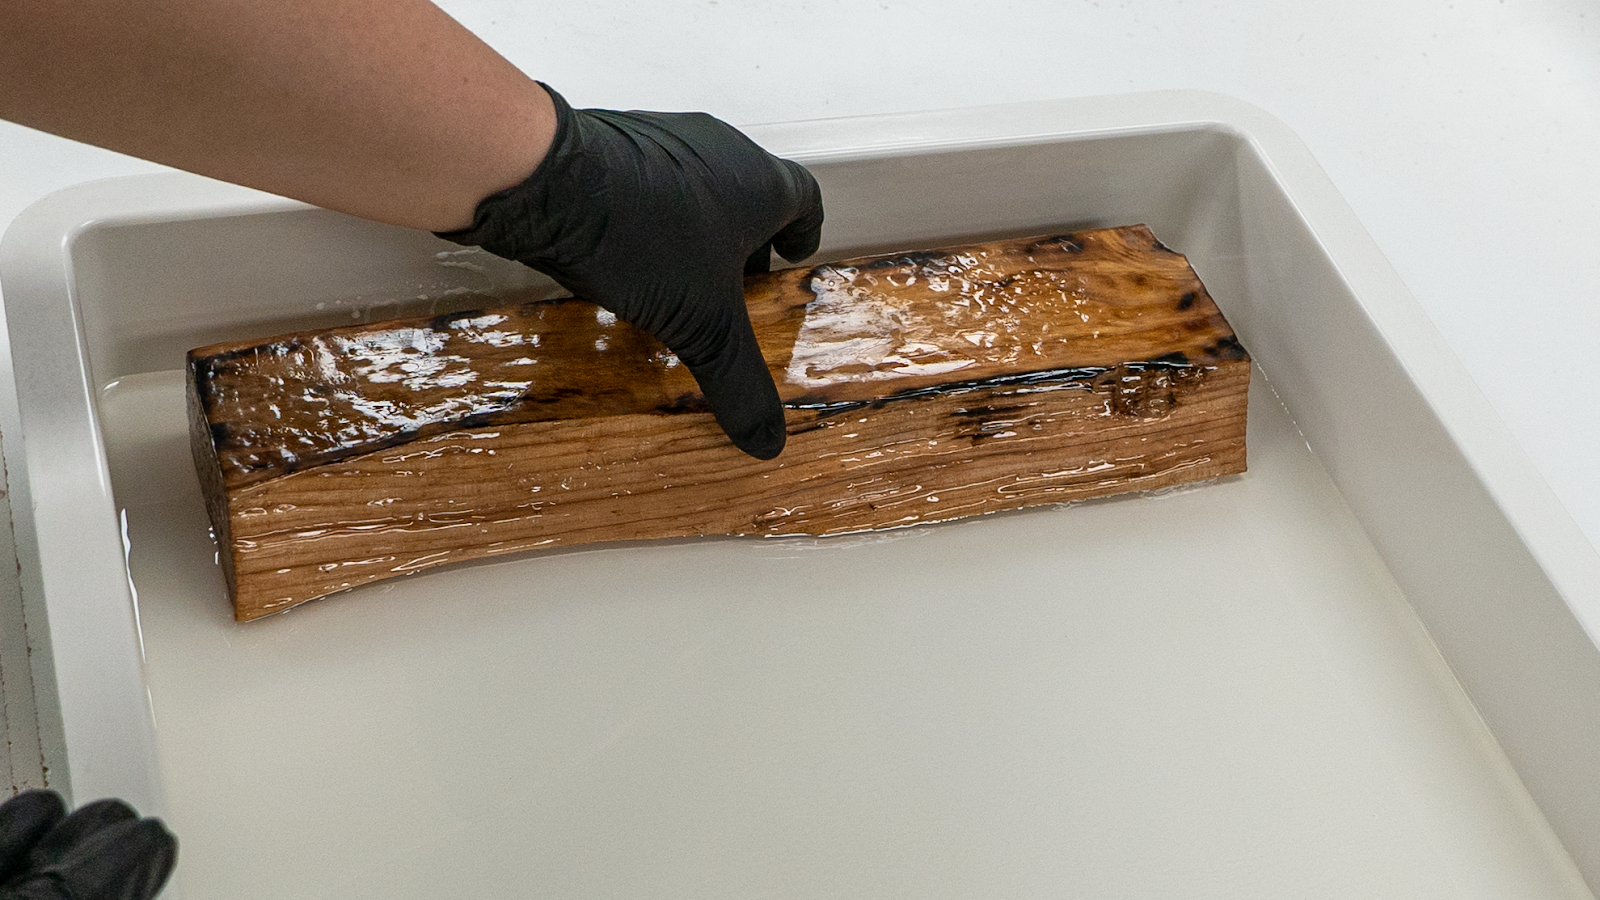
Live edges and Porous substrates:
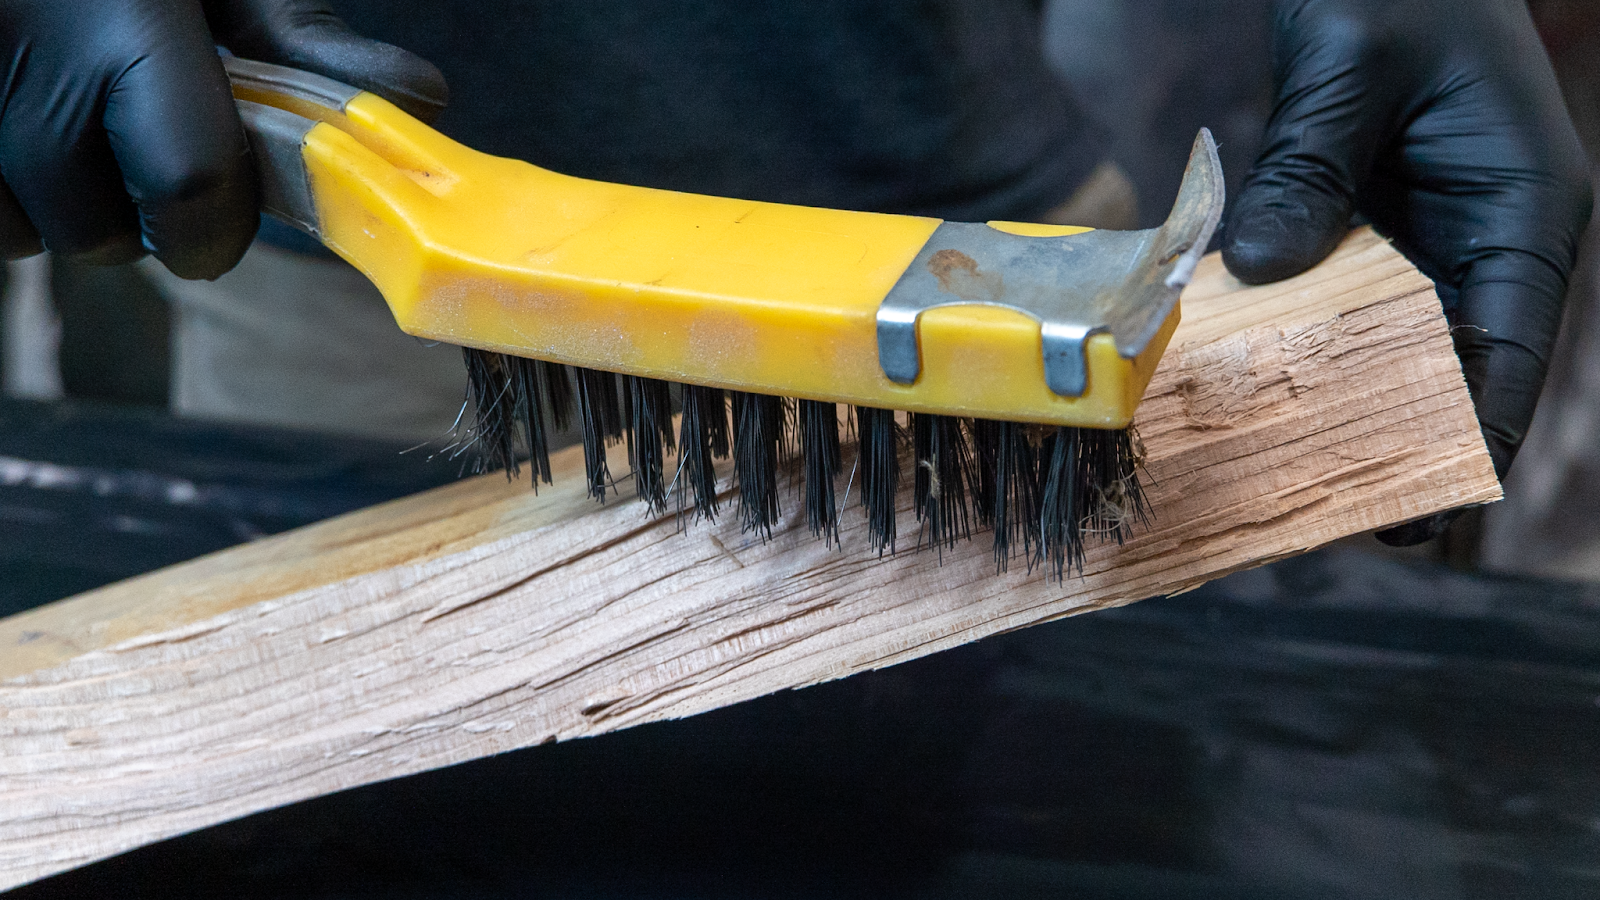
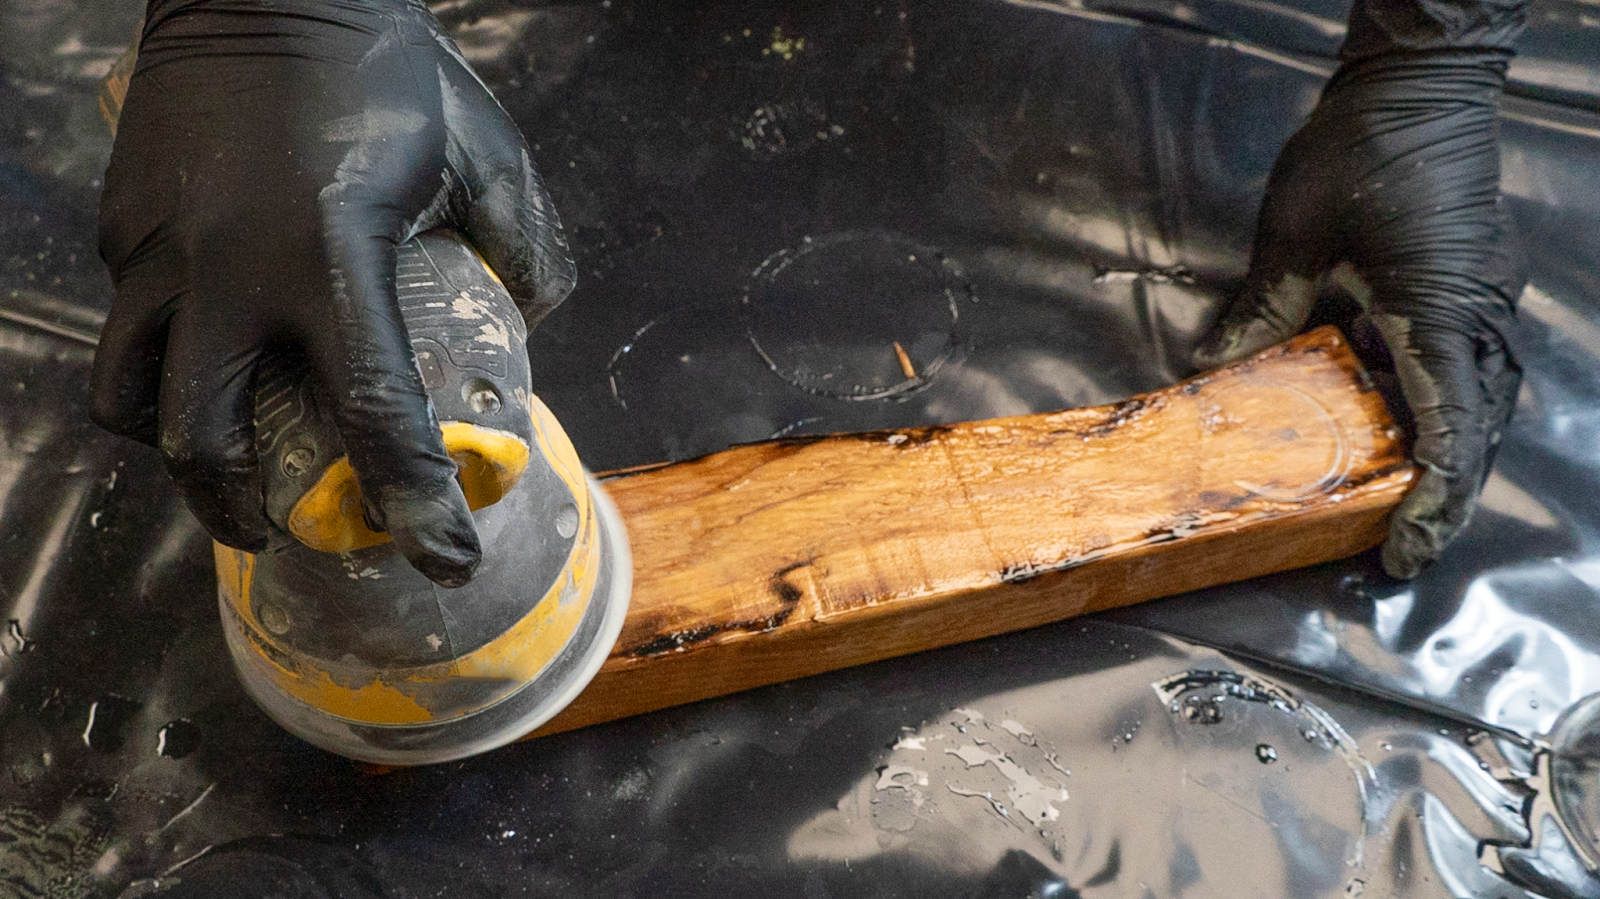
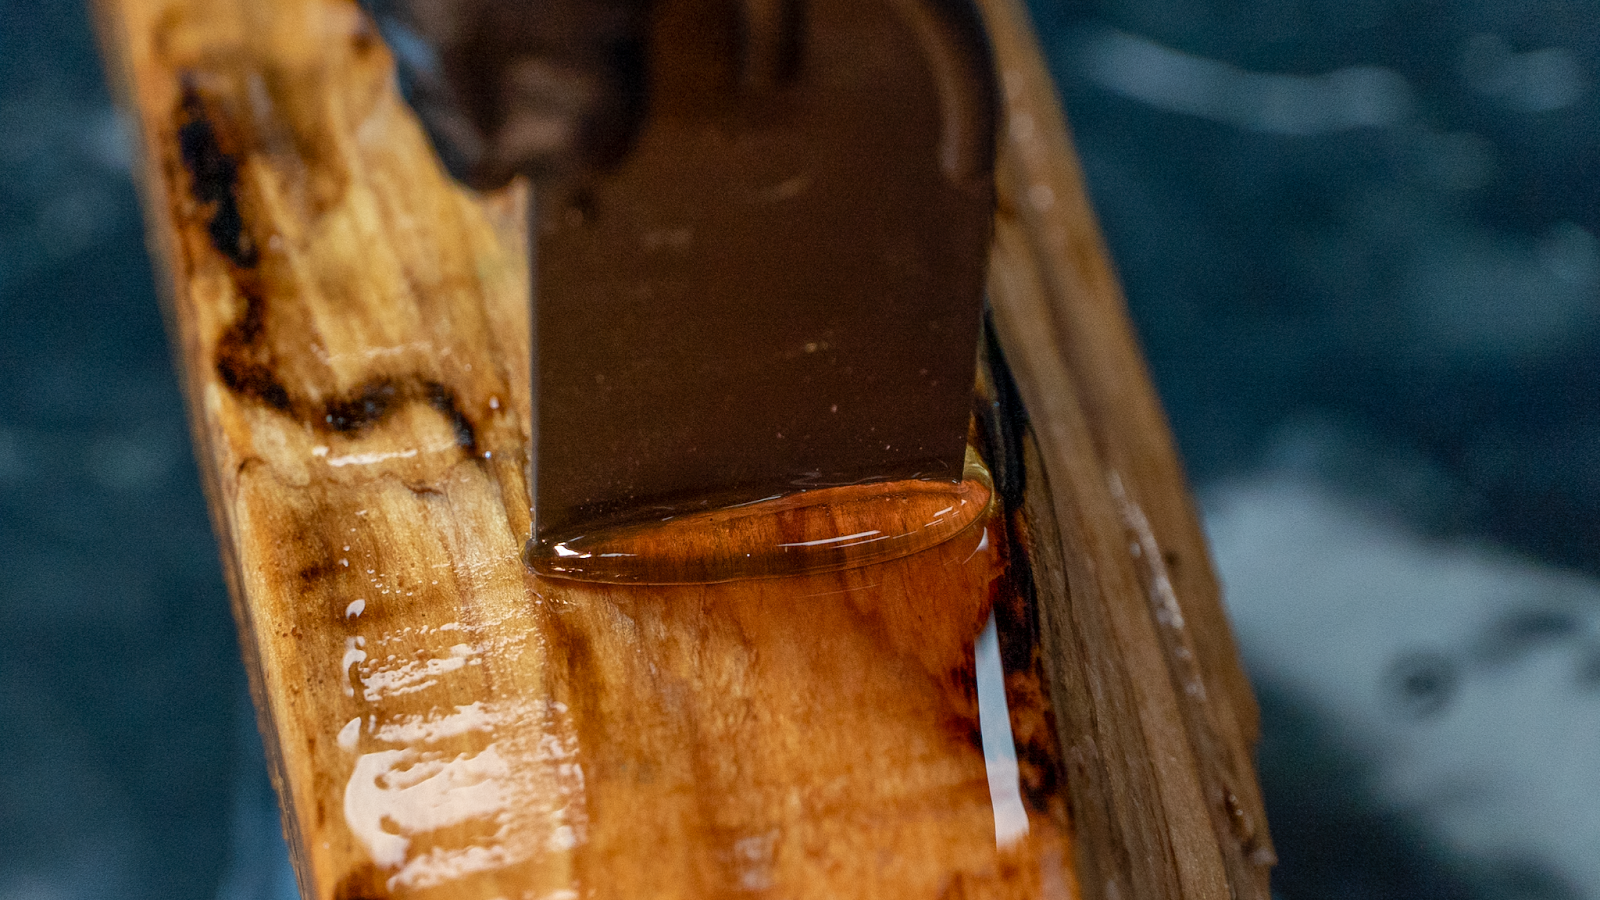
Typically we like to work with kiln dried wood or wood that has an 8% or less moisture content; if working with concrete make sure it is at least a month old. With a soft wire brush you can gently remove any loose debris on the wood that could potentially dislodge and float into the project. Some woods are softer than others so be mindful of how hard you are brushing as we do not want to scratch the wood. If your goal is to maintain the bark of the wood then utilize a chip brush to lightly remove loose debris. Use a leaf blower to remove any fine dust or loose debris.
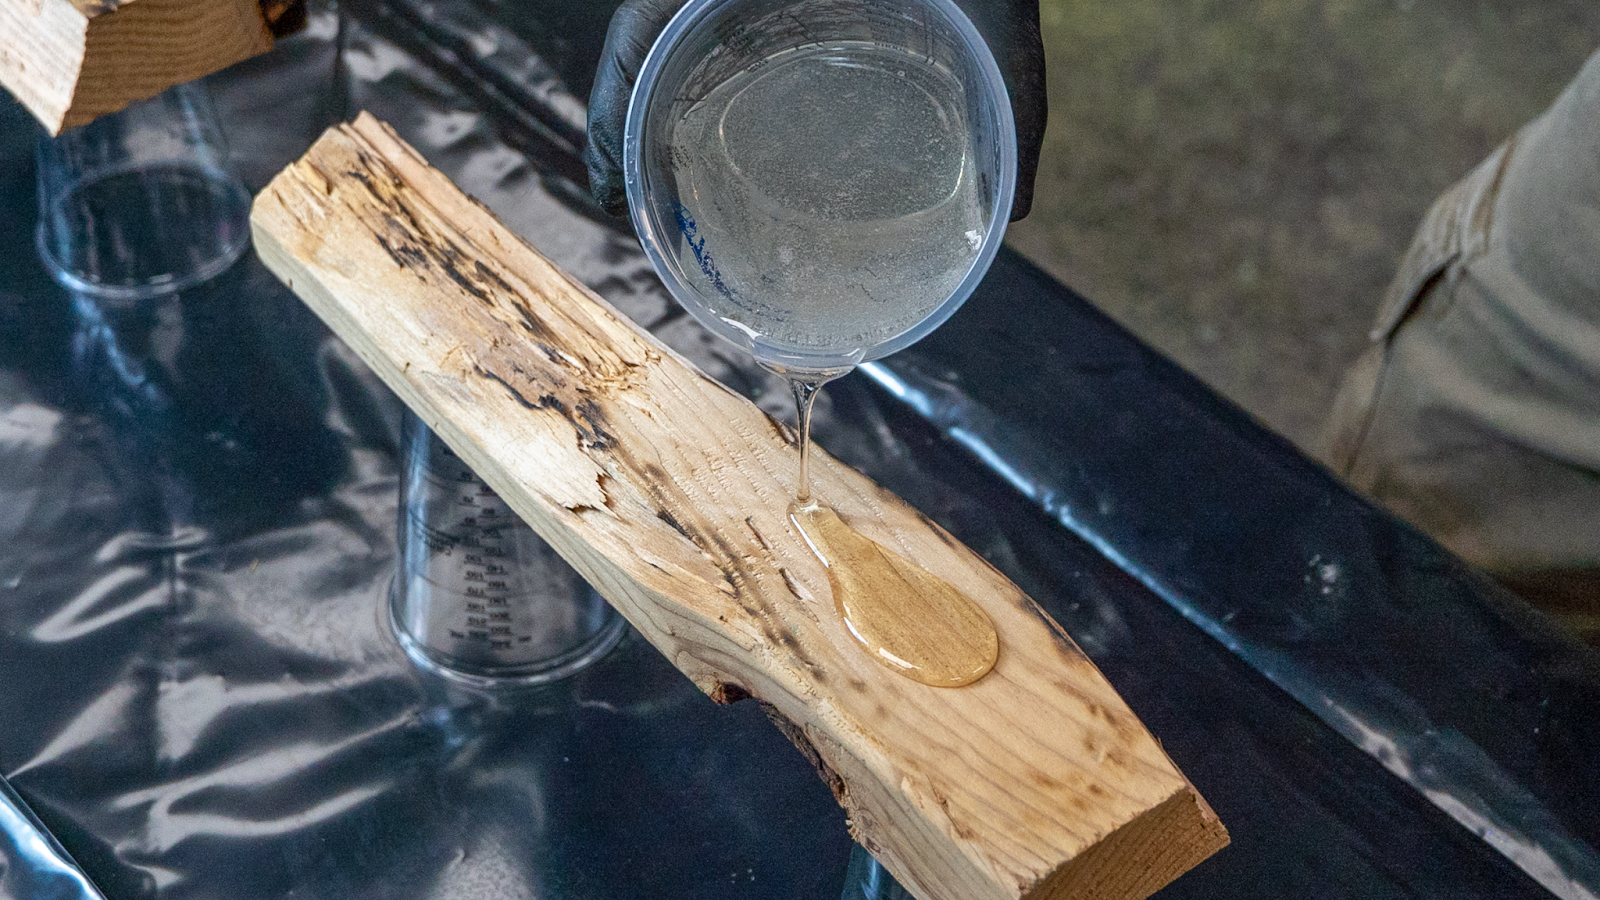
Wood and concrete are considered porous and will need to be sealed all the way around prior to the deep pour. We like to stick with products that we know will play nice together and cure quickly, so we use our Premium Epoxy or our Black Label Epoxy to get the job done. Please refer to the ‘mixing’ and ‘skim coat’ steps in the Countertop Epoxy Instructions.
Remember, some substrates are more porous than others, this means your project may need an additional Skim coat or more. Use your best judgment. If you decide to do multiple skim coats - be sure to conduct a light sanding between coats to smooth out the surface, then reskim. Once sealed to your satisfaction, leave as is and do not sand the final skim coat.
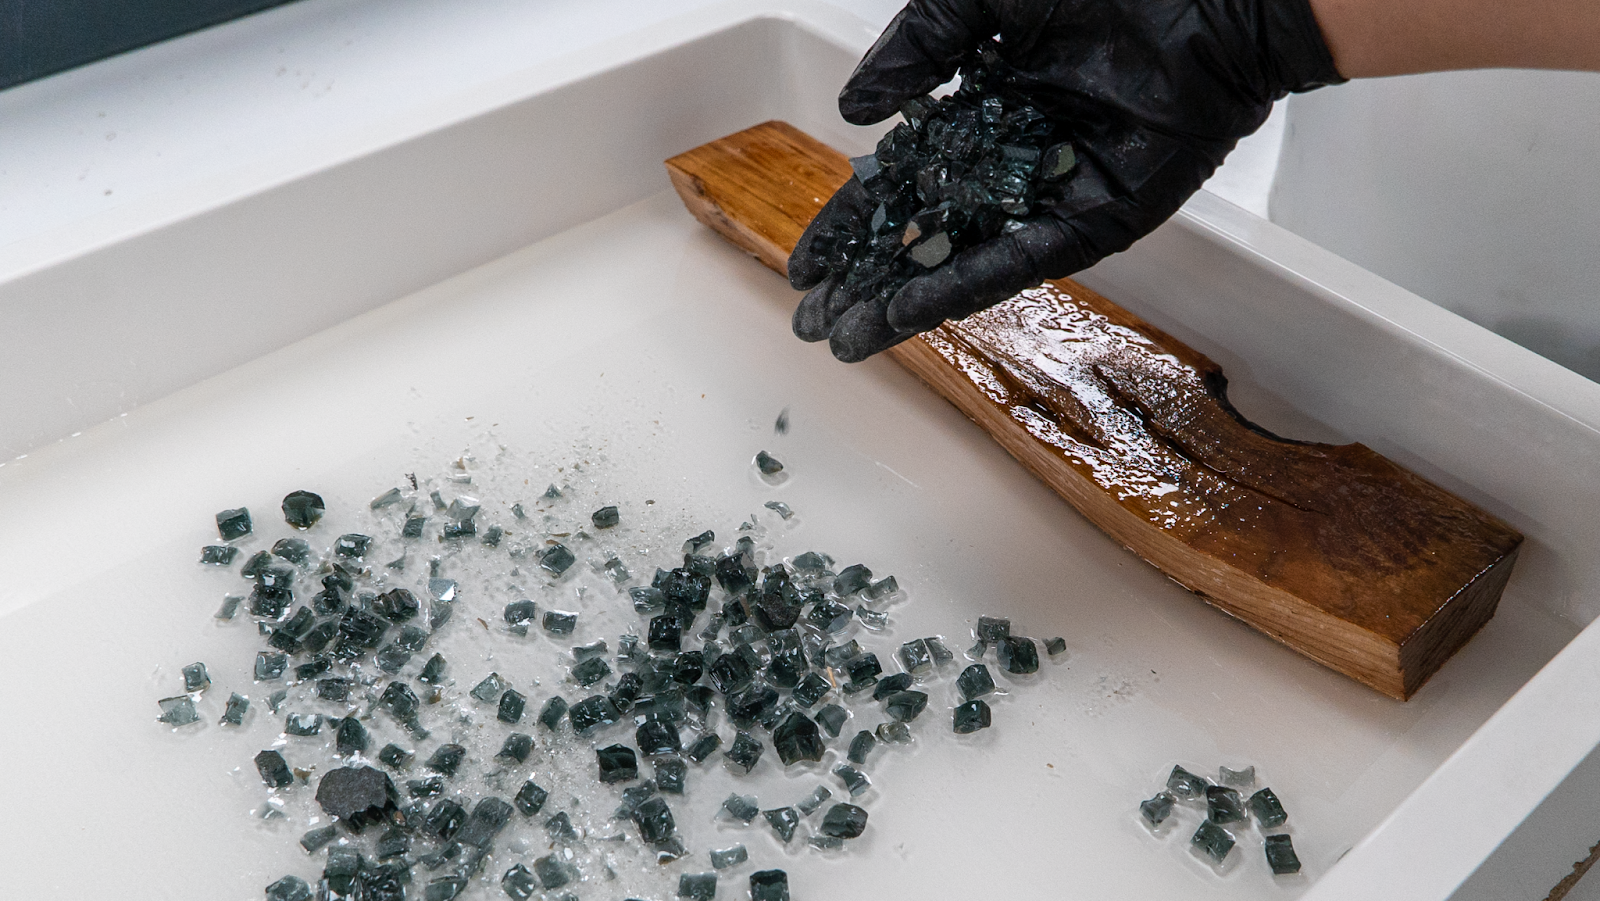
Step 2: Casting Objects
If you do not plan to cast any objects in your project - skip this step!
Plan to cast objects? Please continue. If your mold already has a solid non-transparent bottom (wood, concrete, etc) that you want to cast objects on top of, you can apply a Skim coat of our Countertop Epoxy to the surface and firmly anchor your objects in the skim coat. If the substrate is rougher than desired (very textured wood or concrete) or non-existent since you plan to create a bottom with the epoxy itself - pour a Flood coat with Countertop Epoxy to create a smooth substrate bottom that will ultimately slightly elevate the placement of your objects. Once that Flood coat has cured, apply the Skim coat and anchor your objects.
-
Porous objects should be sealed prior to casting.
-
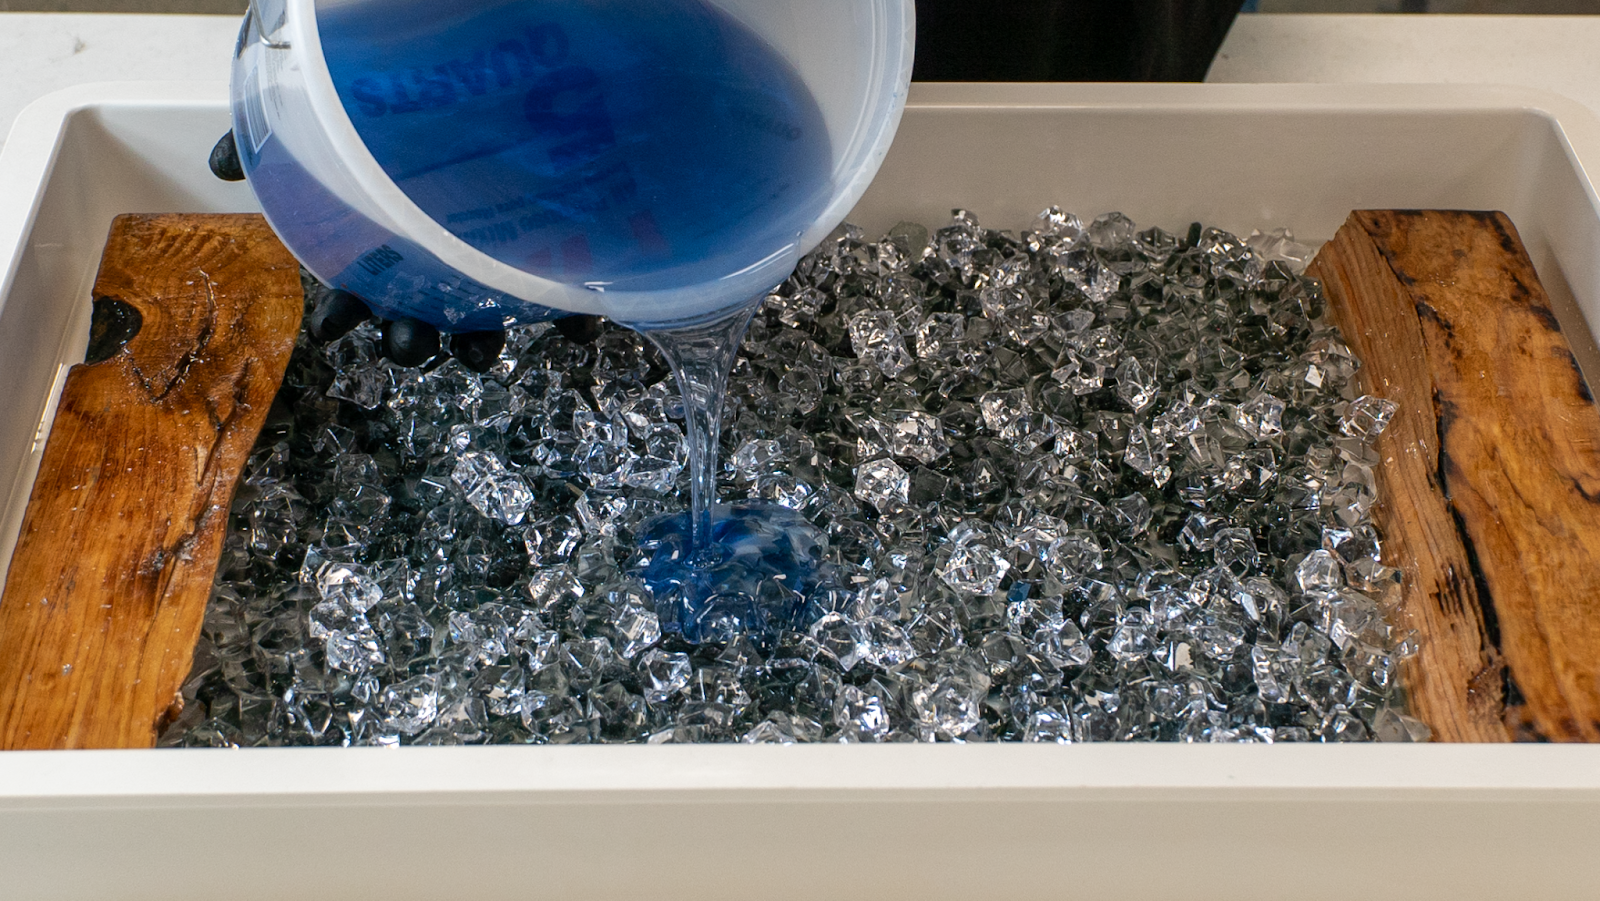
Objects with nooks and crannies can/will trap bubbles; when you pour your Deep cast around these objects do it slowly so that the epoxy can hopefully push out pockets of air rather than trapping them.
Step 3: Mixing, Pouring & Monitoring
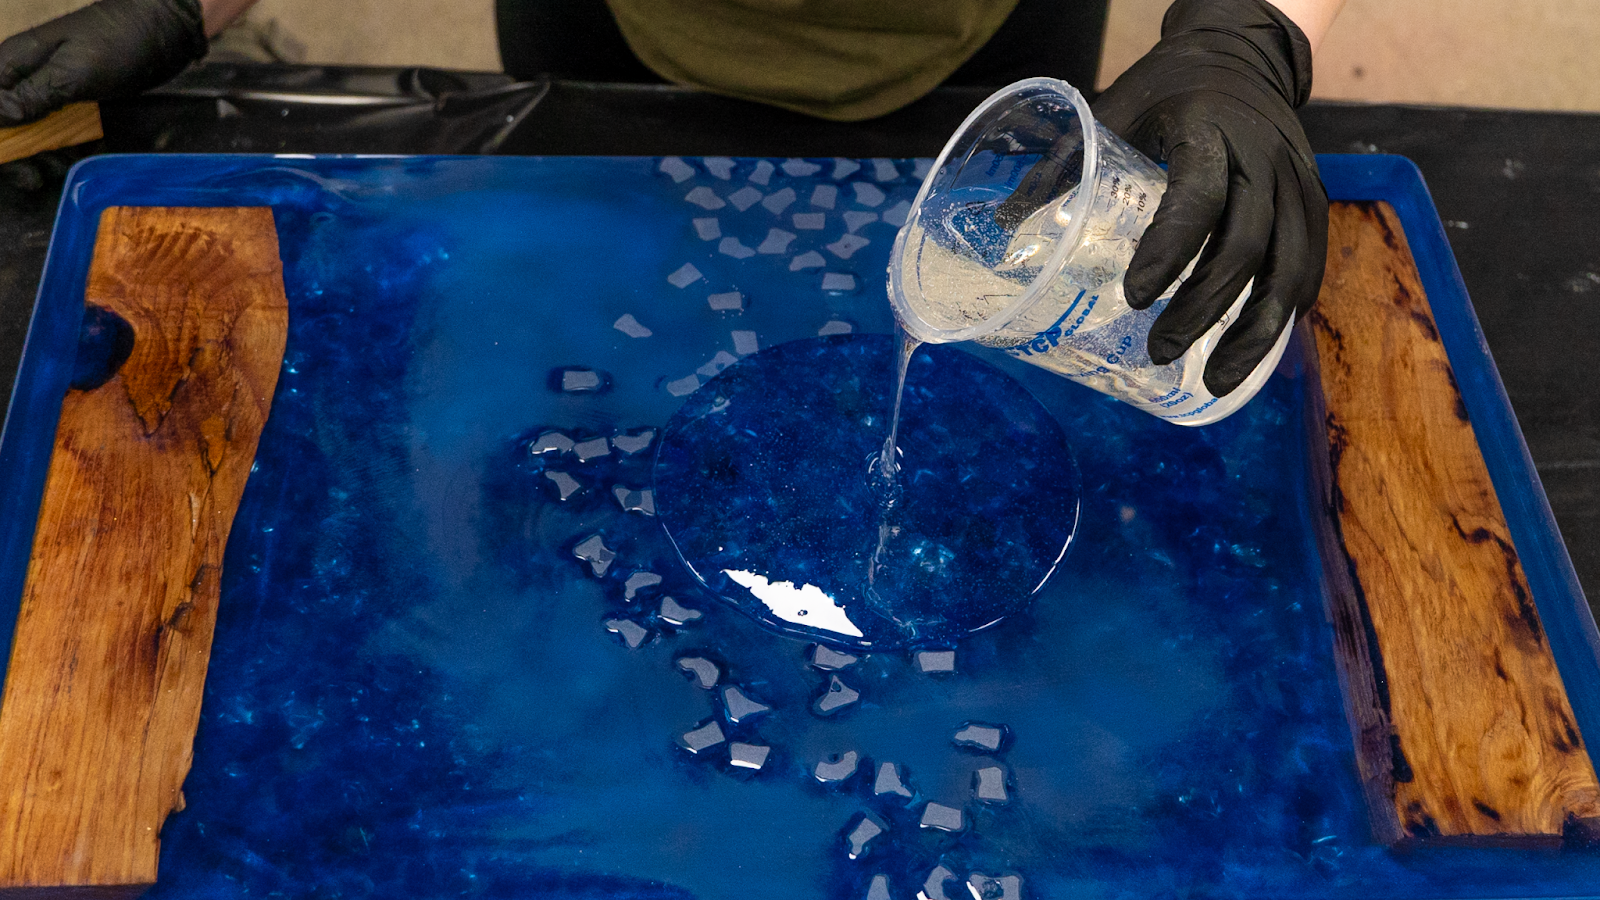
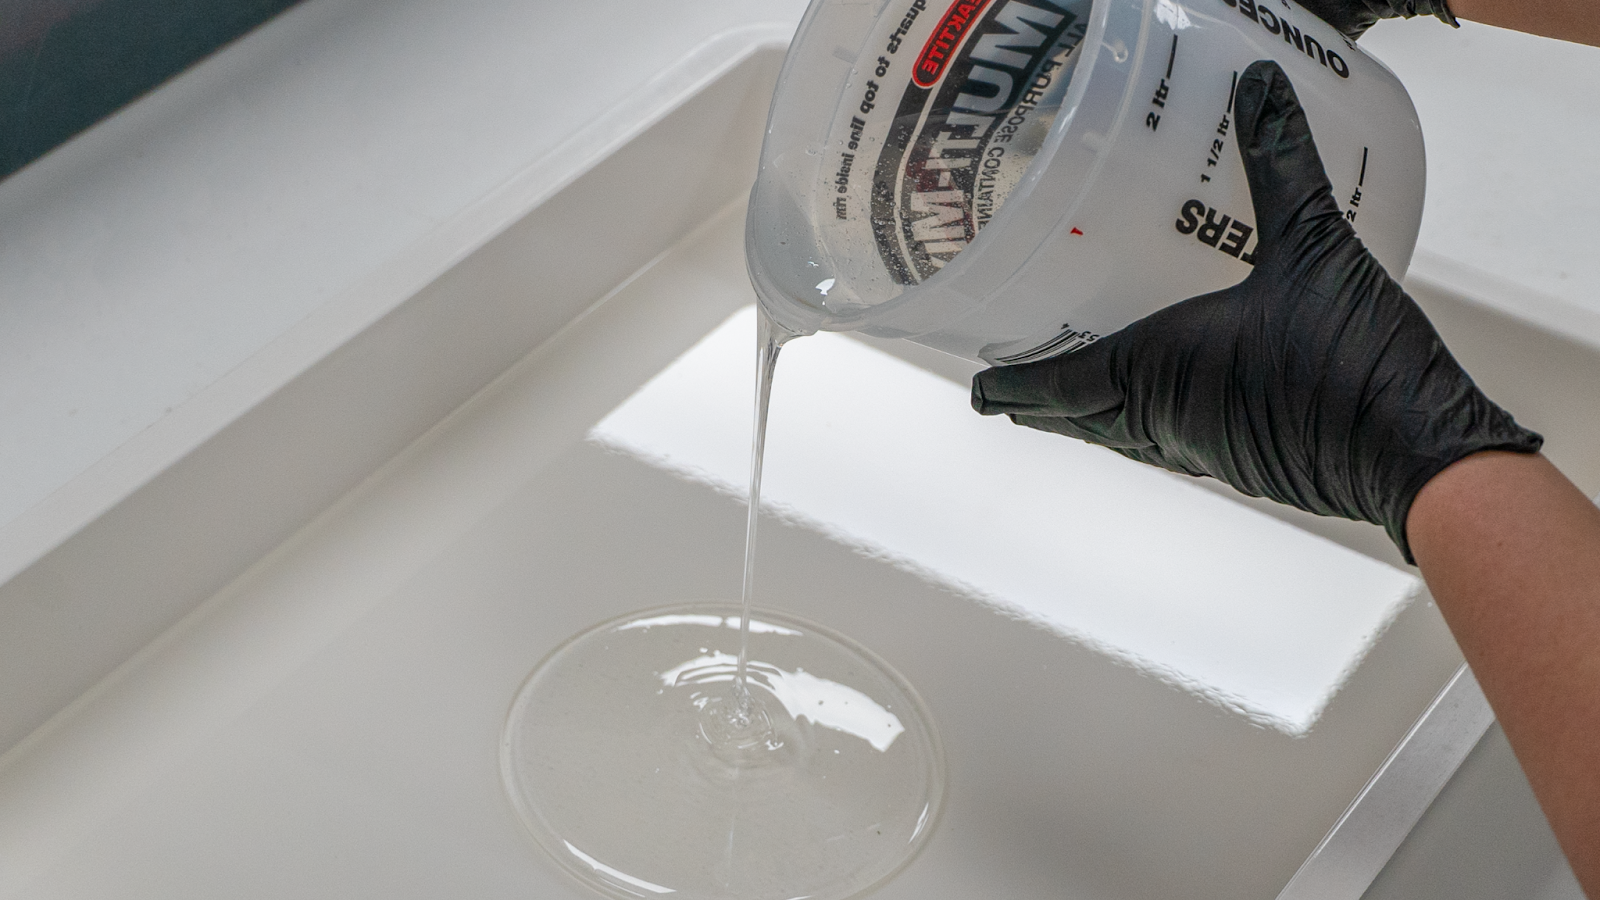
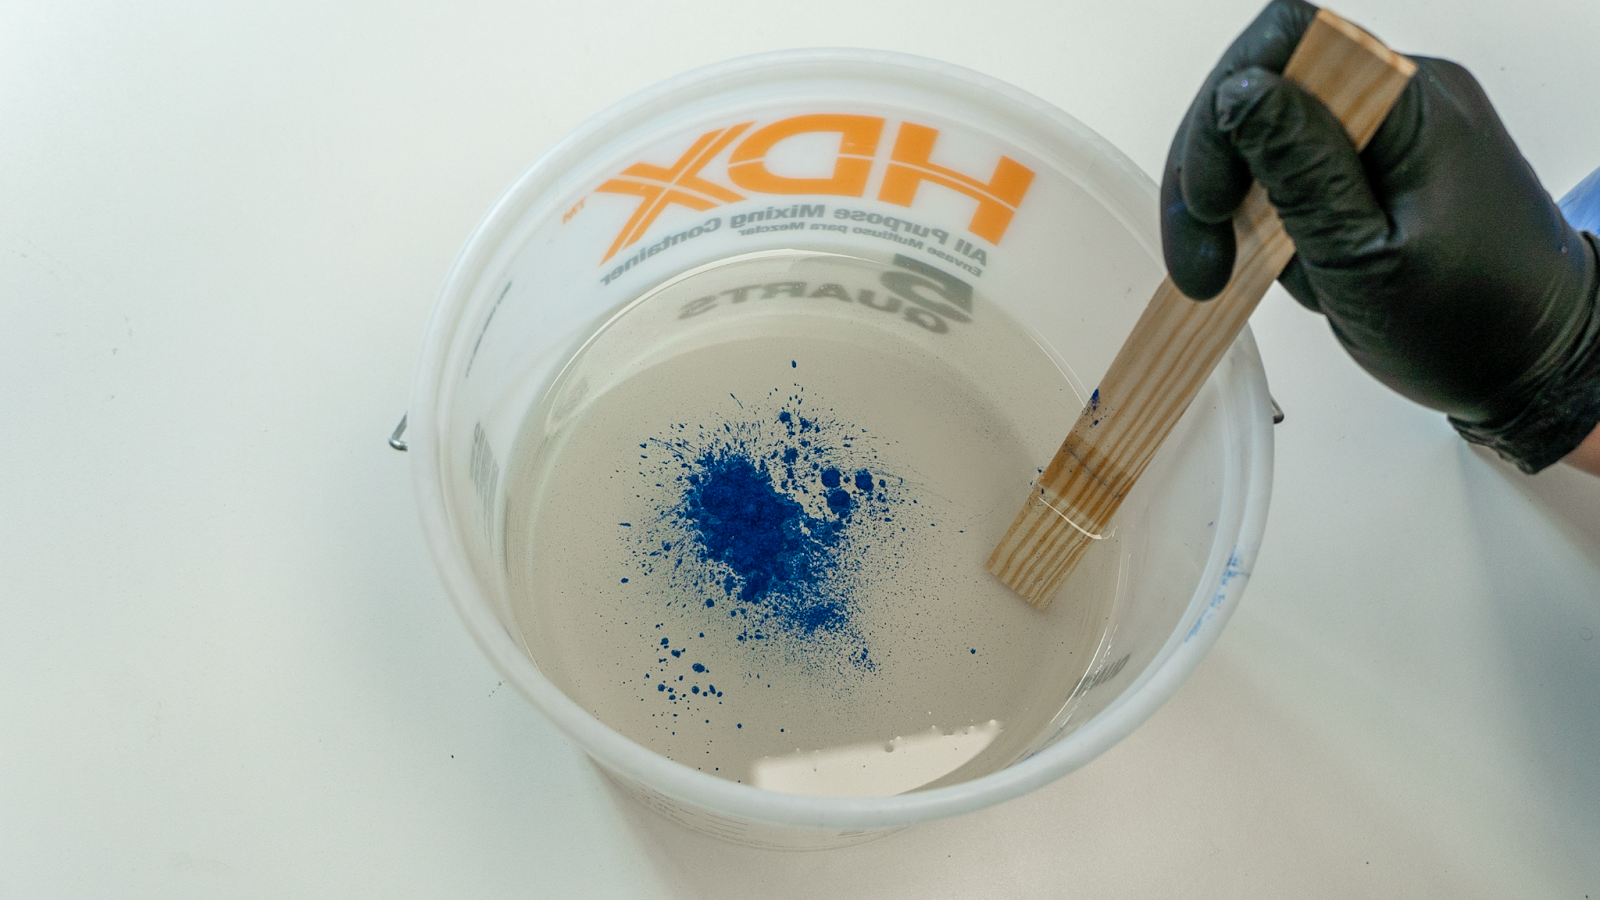
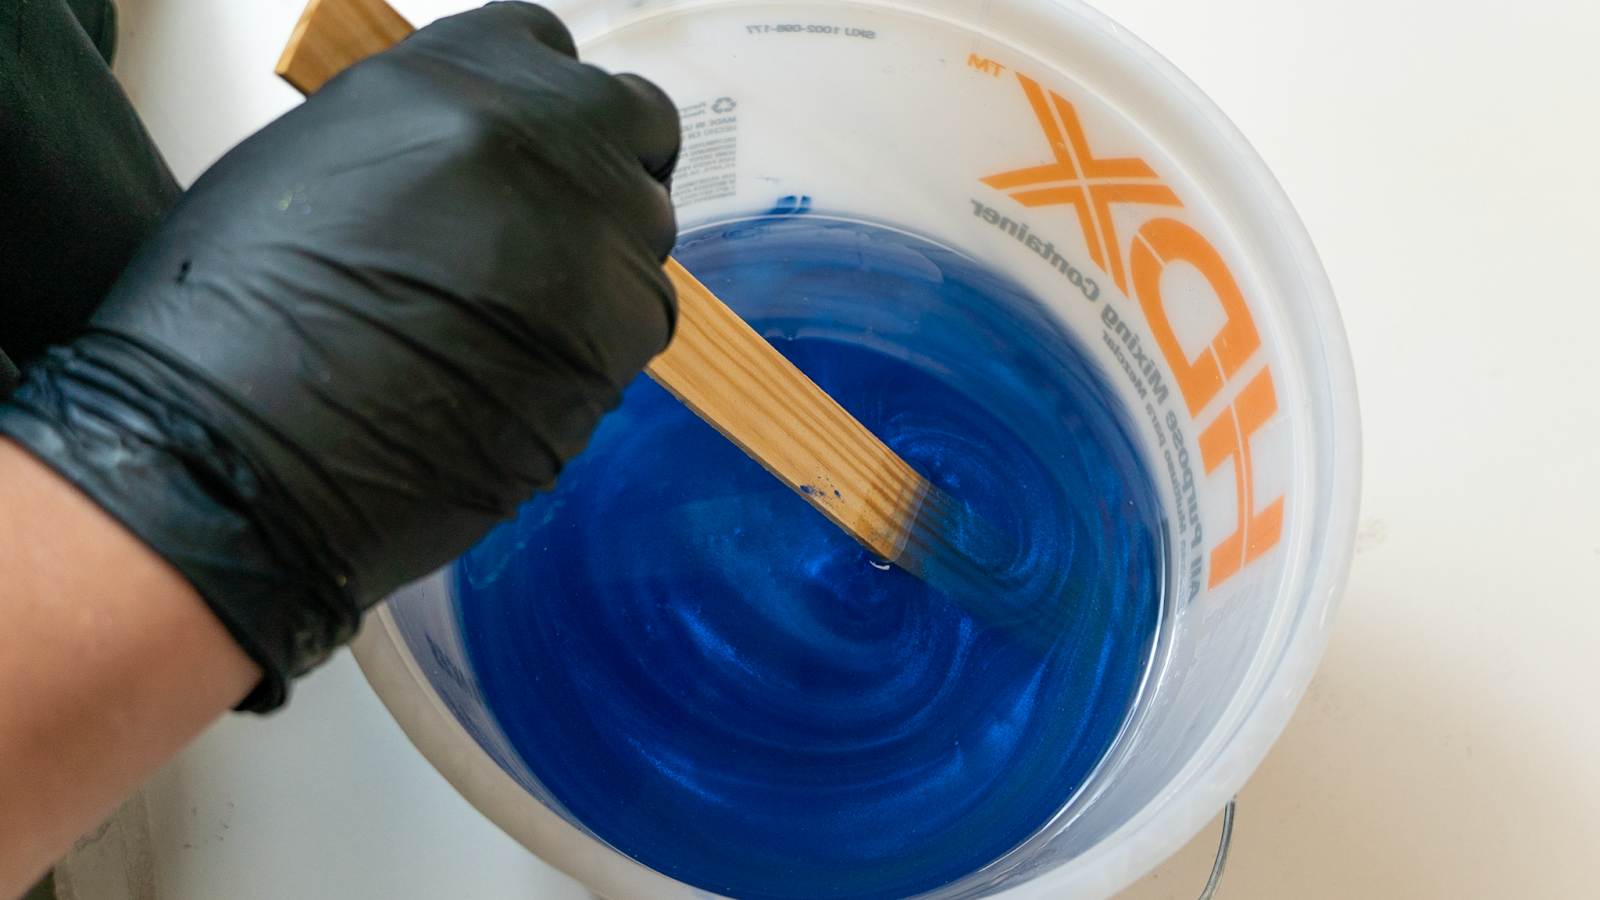
Our Deep Cast Epoxy is a two part system at a 2:1 ratio. Pour your Part B Hardener into an empty and clean mixing container. Then pour double the amount of Part A Resin into the same container. Since this epoxy is meant to be poured at greater depths we need to limit the amount of bubbles created during the mixing process. Make sure you are mixing thoroughly, not vigorously, for a total of 5 minutes. Be sure to periodically run the mixing stick along the walls and bottom of the container and off the stick - and continue to mix.
After 5 minutes is up, pour the mixed epoxy into the second mixing container. Only at this time will you add the appropriate amount of color to your mix or keep clear if desired. With a brand new stir stick, continue to mix for an additional 4 minutes while ensuring you run the mixing stick along the walls and bottom of the container and off the stick again.
-
Ratios are important for all pours but especially with larger pours where a 2:1 ratio difference can really add up after multiple batches for larger projects.
If adding color, conduct a stick test! With a sharpie draw a shape/letter on your wooden stir stick then add some of your color to your epoxy batch. Mix thoroughly then pull that stick out to see how transparent or opaque your epoxy is at that time. If you can see the sharpie shape/letter then you have a somewhat transparent epoxy; if you cannot see it then that indicates a full color blocking epoxy.
-
A plastic paddle mixer can be used for 2+ gallons at a time however this must be conducted at a consistent slow enough speed to avoid creating microbubbles or a vortex which will incorporate bubbles. Turn on only when fully submerged; shut off prior to removing. A stir stick is still recommended for the walls and floor of the containers.
-
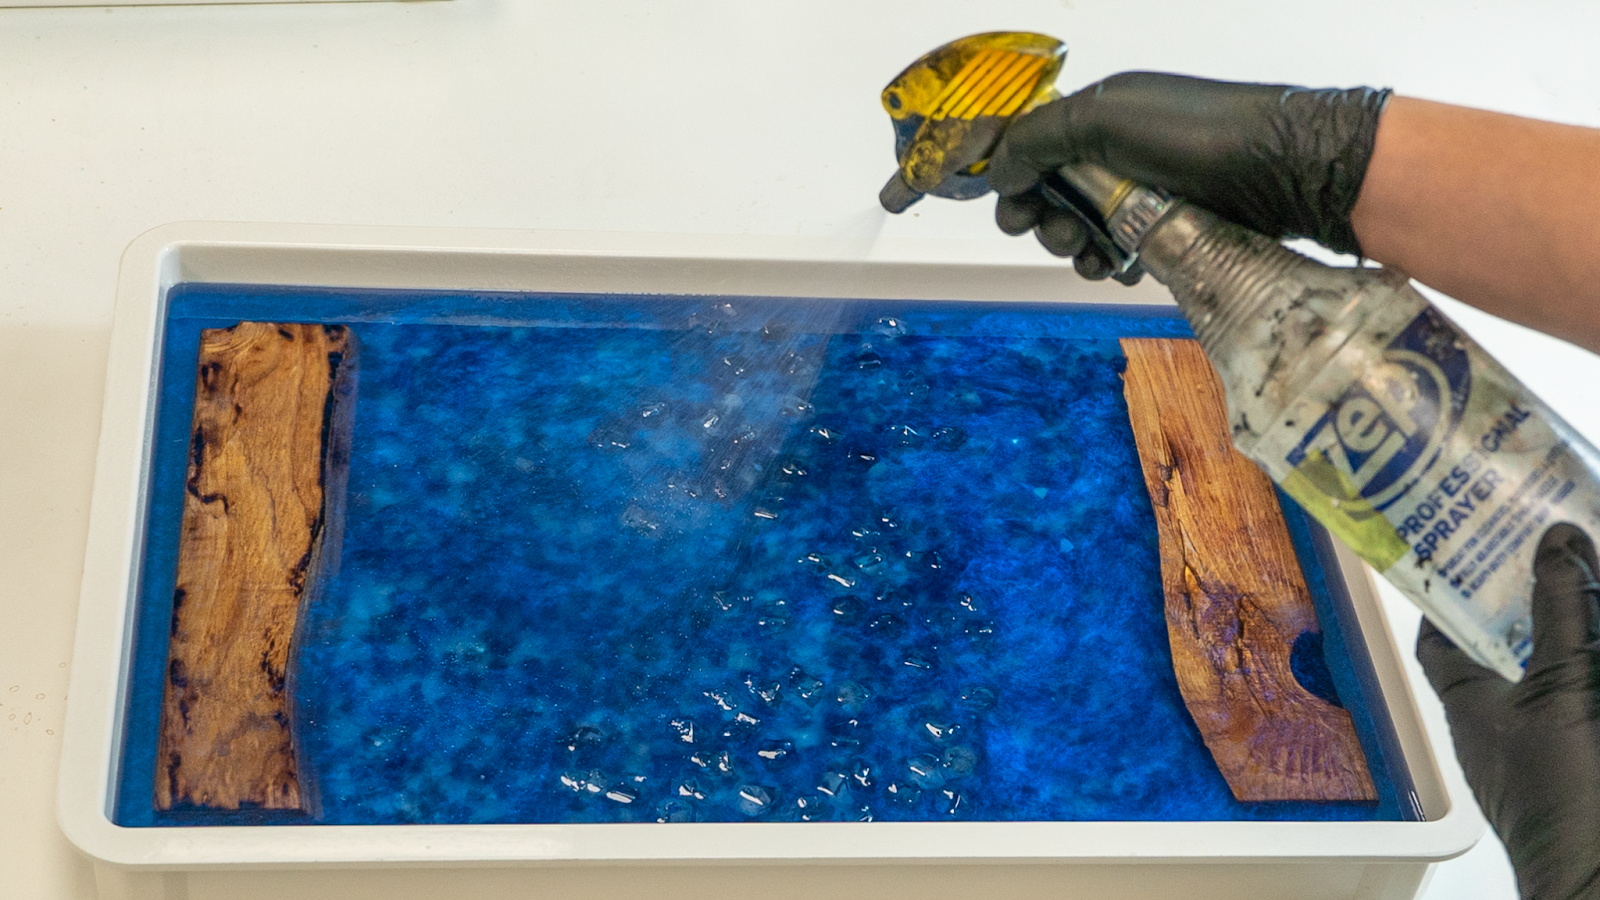
Deep Cast is quite fluid for easy air release but if you see any pesky bubbles you can use isopropyl alcohol.
-
Do not use a torch for these types of projects.
Immediately pour out all of the product onto your mold! You can pour 1-2” inches at a time; some epoxy experts with experience can pour up to 3 inches with our formula. Monitor temperatures with our Temperature gun for the first several hours to ensure your epoxy does not climb higher than a couple degrees than your Goldilocks starting temperatures - especially when you are doing deeper pours. Saturating the surface of the project with isopropyl alcohol will help keep temperatures down. Continue this process until the temperature plateau’s for at least 4-6 hours.
-
Failure to monitor your project after it has been poured increases the likelihood of your epoxy exotherming.
-
When pouring between 1-3” most projects will cure within 48 hours.
-
Pouring less than 1” will result in taking longer than the standard 48 hours to cure as the product is designed for deeper pours.
-
If your project needs less than an inch, keep in mind that our Countertop Epoxy can be poured up to 1/4th of an inch at a time and can receive another Flood coat within 12-24 hours of the first Flood coat curing.
We color our epoxy with our liquid pigments and metallic powders. Our color line is color stable, UV resistant, and designed to cure with our epoxy. We would encourage you to stick with our product line to ensure the best long lasting results possible.
-
1 x 12 ounce Liquid Pigment can color block an entire 1.5 gallon kit.
-
Approximately 125-175g of a specifically selected Metallic Powder can color block an entire 1.5 gallon kit.
-
Ultra fine glitters, glitters, and translucent colors will not color block - these are typically used for accents.
-
Larger heavier glitters will likely sink; fine glitters may or may not float. Always do a test prior to committing to a large project.
-
Review the product description of your desired colors or call the office to inquire.
Step 4: The Final Touches!
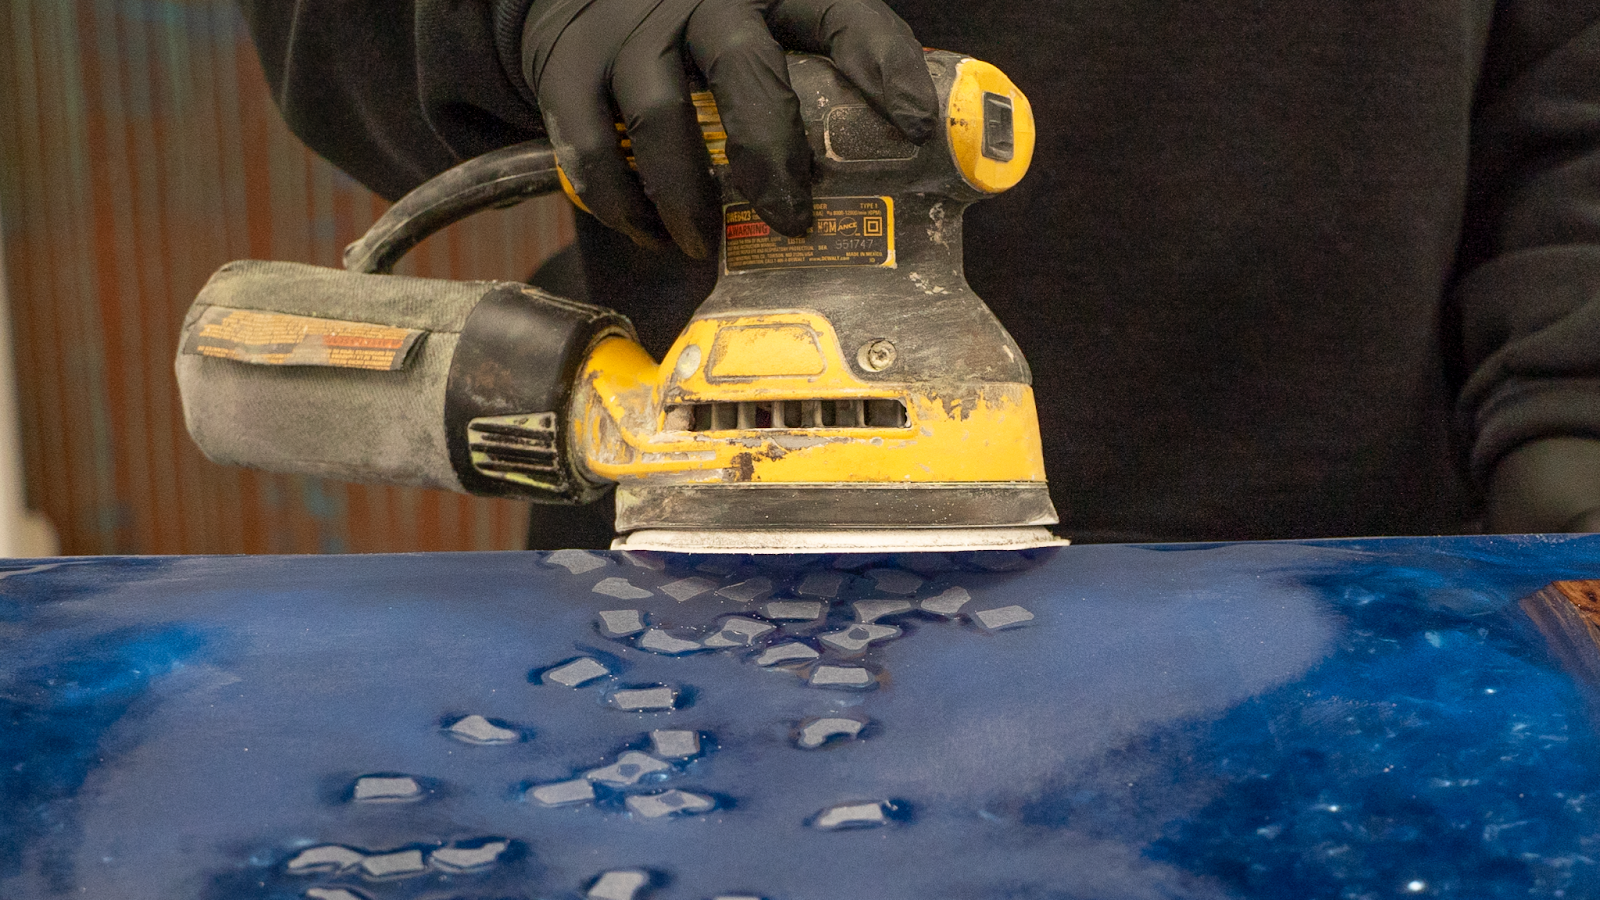
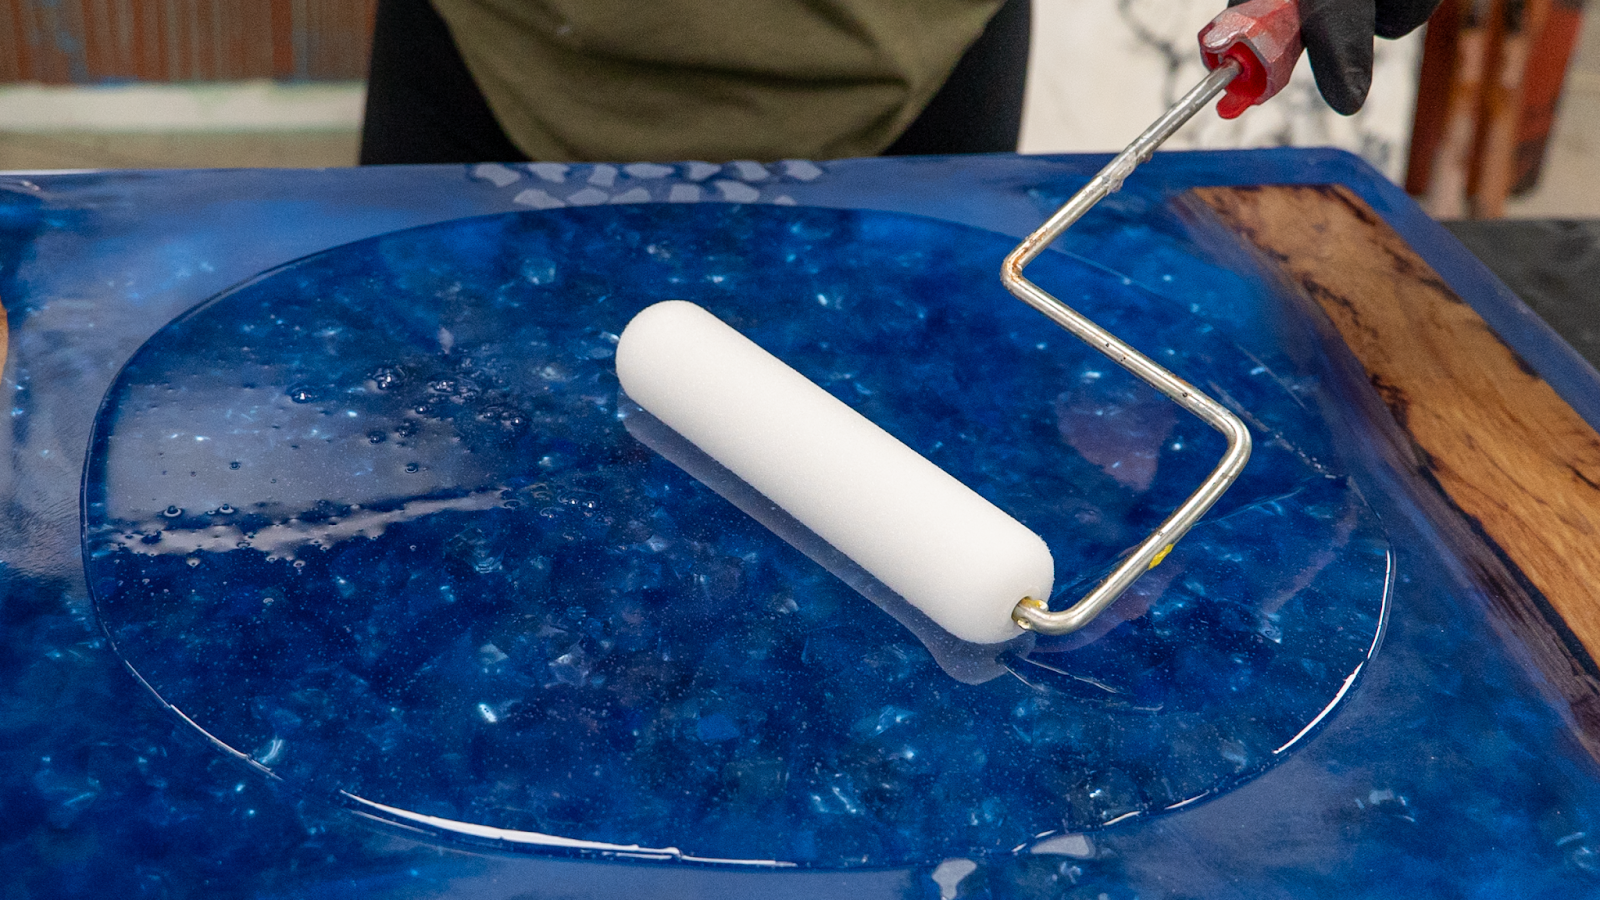
Due to the nature of how slow Deep cast cures it does not have the same hardness level as our Countertop Epoxy. This holds true for nearly any deep pouring epoxy. For that reason, we always apply a Flood coat of our Countertop Epoxy on top of our Casting project for the hardest surface possible. For artsy projects that are for show only - then perhaps a hard countertop epoxy pour on top isn’t needed; but if this project is functional art meaning it serves the purpose of being a conversation piece along with being used as a table - we urge the application of our Countertop Epoxy as a top coating. Once the casting project has cured you may want to sand any rough edges and then apply that top coat. If it has been longer than a week, consider a light sanding throughout the surface of the project, clean with isopropyl alcohol, and then apply that top coat!
Please refer to the ‘mixing’ and ‘skim coat’ steps in the Countertop Epoxy Instructions.