

How to Pour Epoxy over an Existing Tile Floor
Watch the entire how to video on Youtube. Make sure to like and subscribe for more epoxy videos!
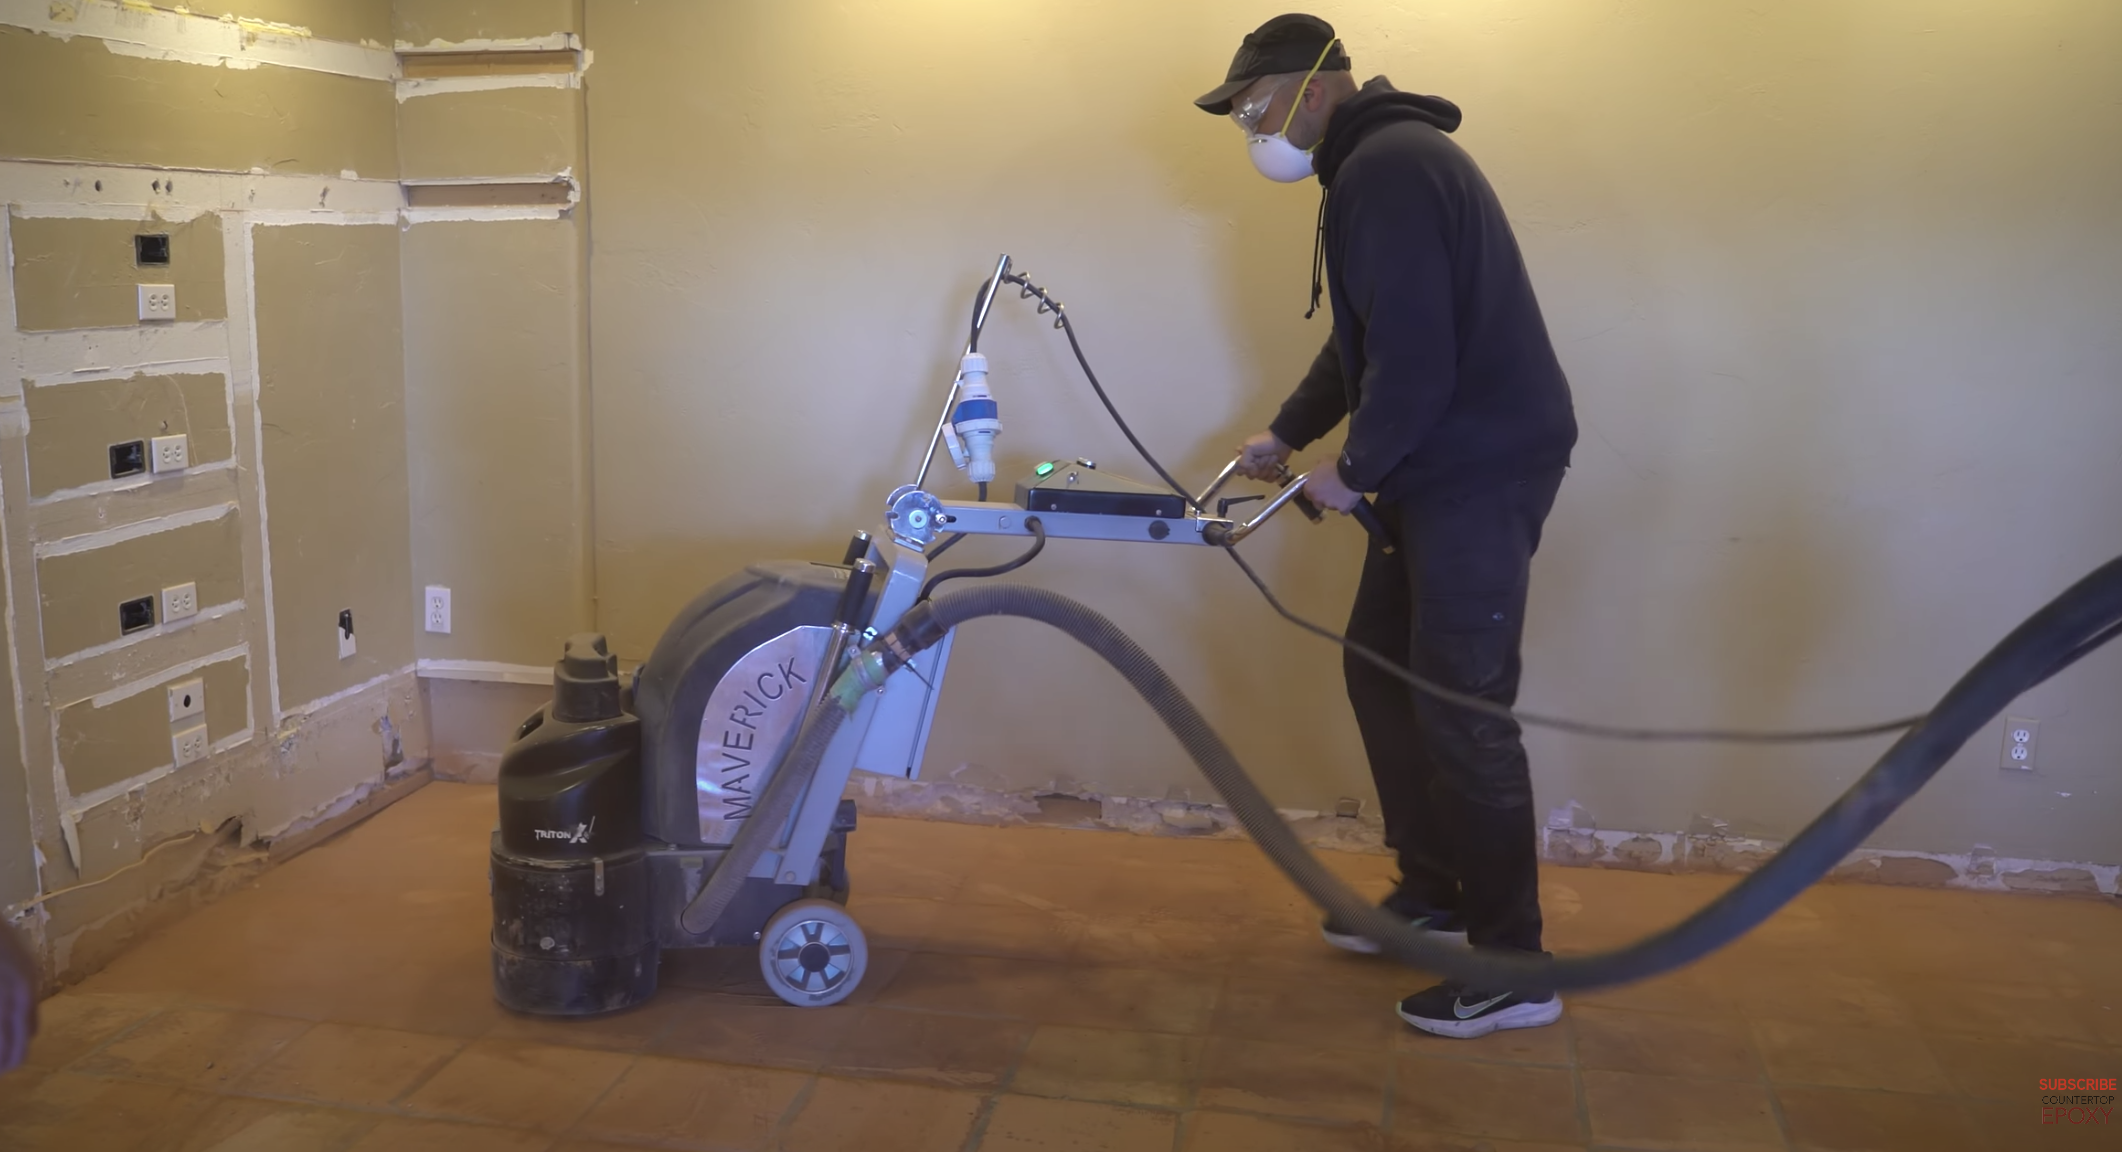
In this project, we went over a tile floor that had quite a bit worse damage than normal. We started out by grinding all our high spots and removing any failed or loose tile. Generally, we grind in less than 10% of our tile floors because in most applications, they're not as uneven as this. The tile was very clean and porous on the low areas and very dry. So we were really only trying to grind the high spots down. We used our standard diamond grinding tools that we use for any kind of concrete or ceramic or porcelain tile. And we did use dust extraction equipment to try to keep it a little bit cleaner while we were doing it.
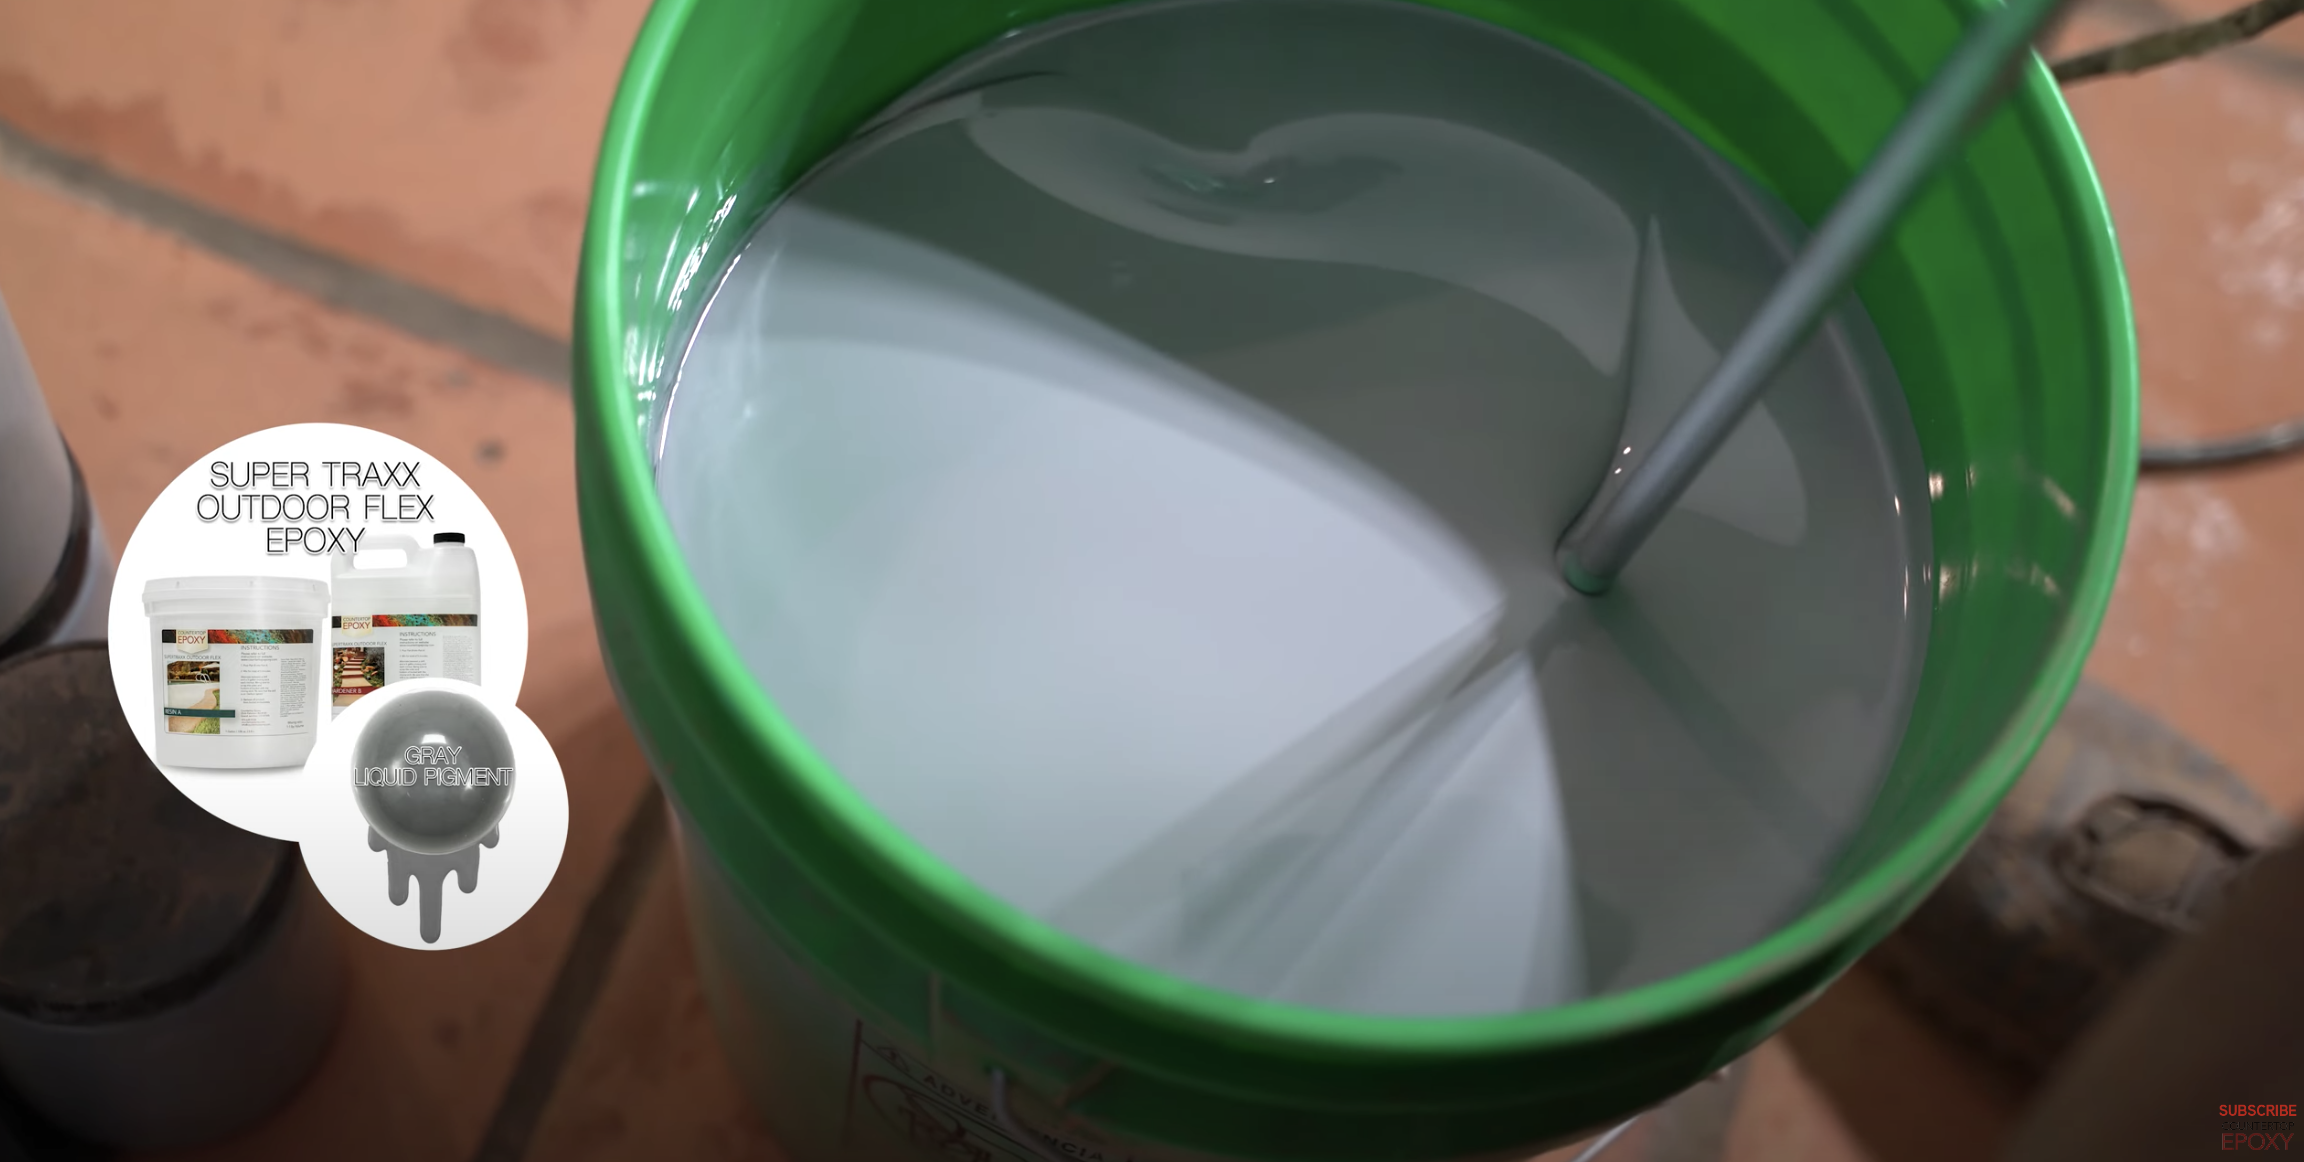
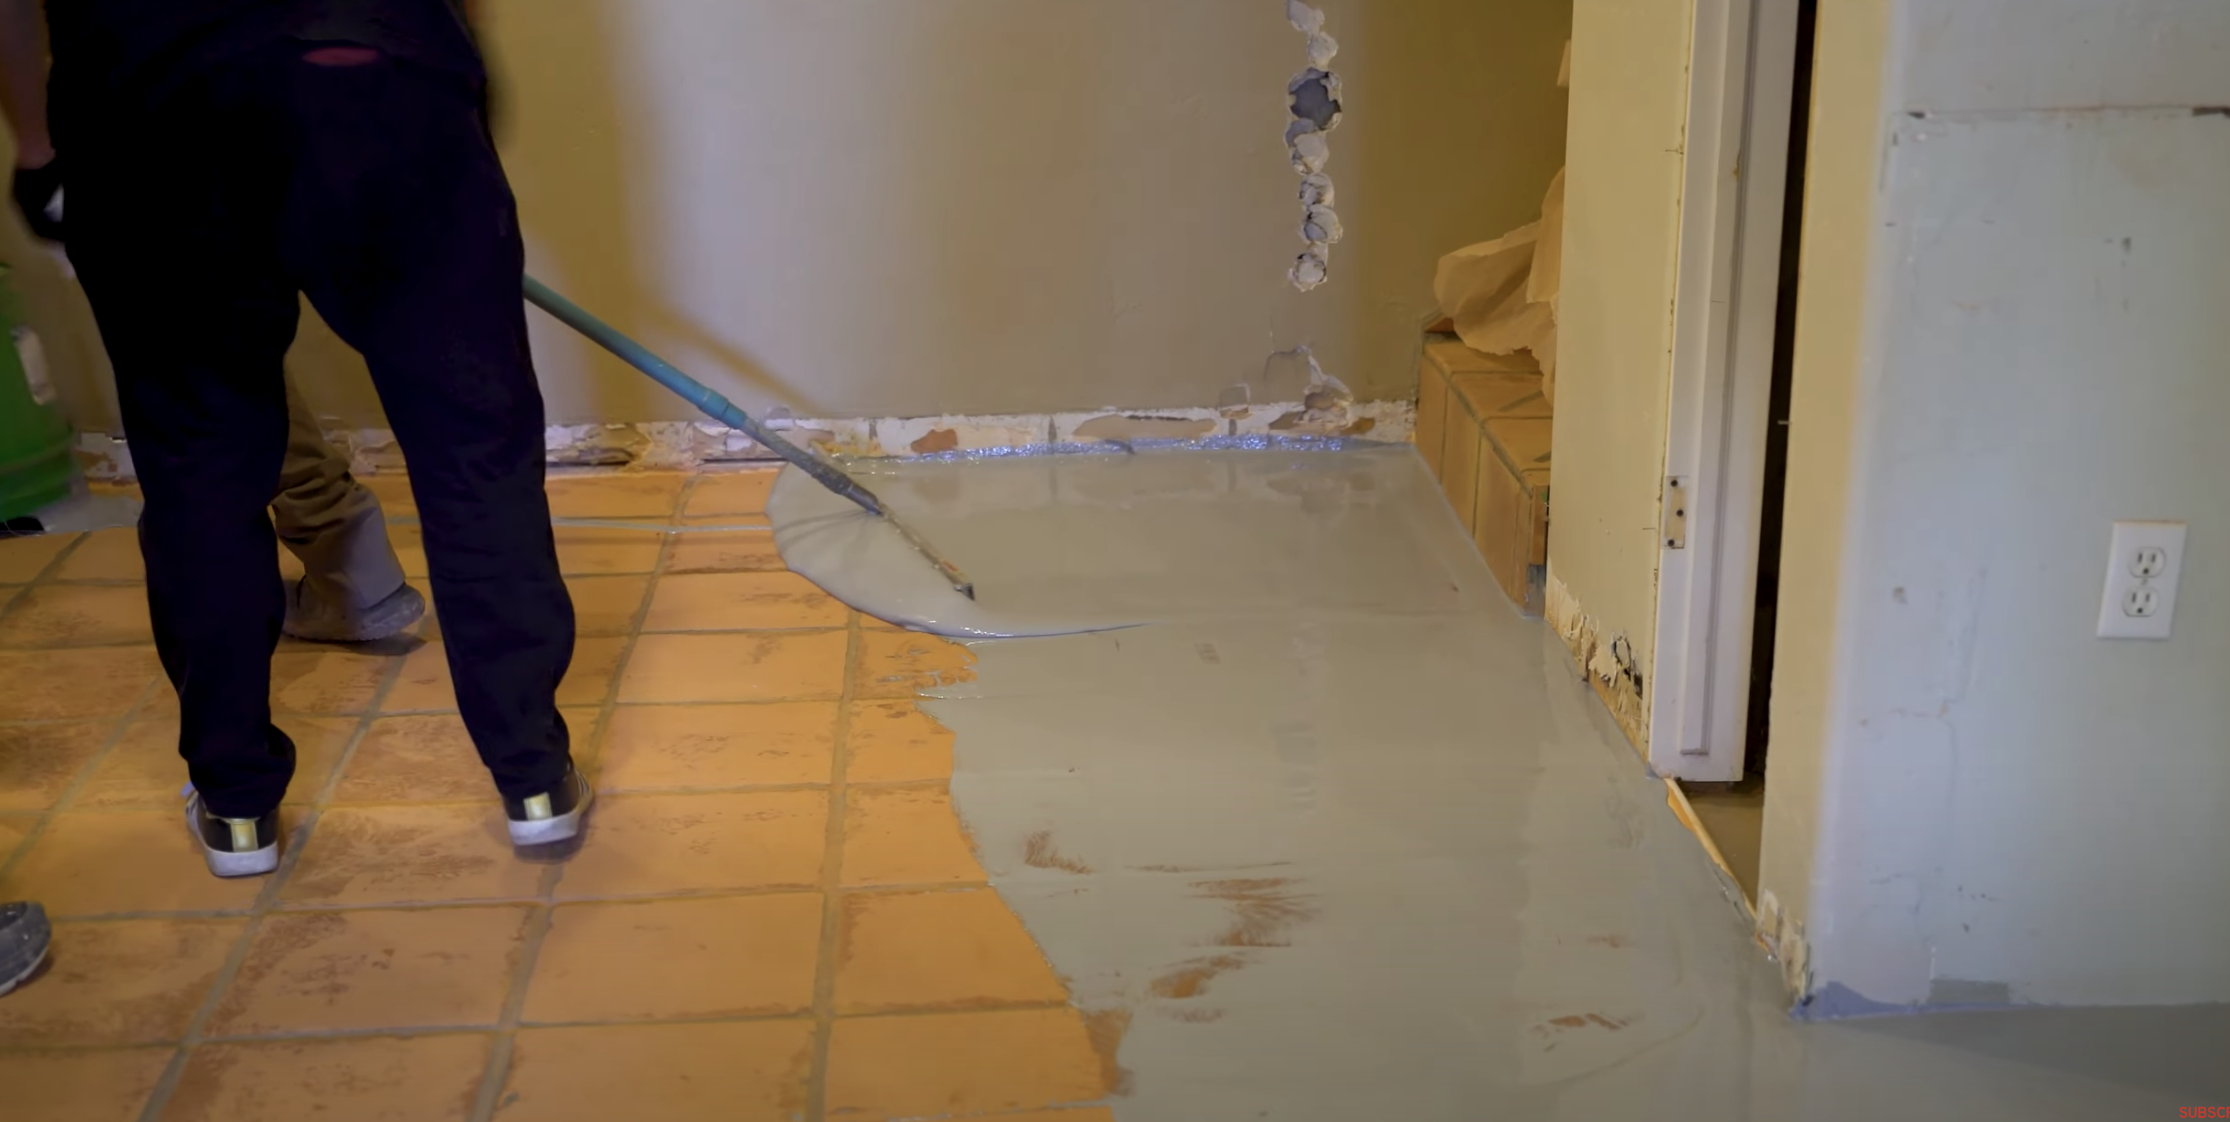
After grinding the tile floor, we started out by dust backing and then leaf blowing from the ceiling down trying to get any loose debris prior to pouring epoxy. We poured a very thick slurry that we made by premixing our epoxy. We used our Ultra Flex Epoxy in this case and then we dumped in approximately half a bag of our 20-minute joint compound for every gallon of a box we mixed. This makes a pretty nice pasty slurry that you can fill a lot of low areas with. And it's a very inexpensive way to volumize your epoxy.
We did create a few transitions using foil tape. I generally prefer the thicker and the more rigid of the two different types. Just be careful when putting this down. You don't cut yourself. It is a very sharp edge, but it's a really nice way to start or stop the epoxy wherever you want to and the foil will not stick to the epoxy during the epoxy cure. So it's easy to remove the next day.
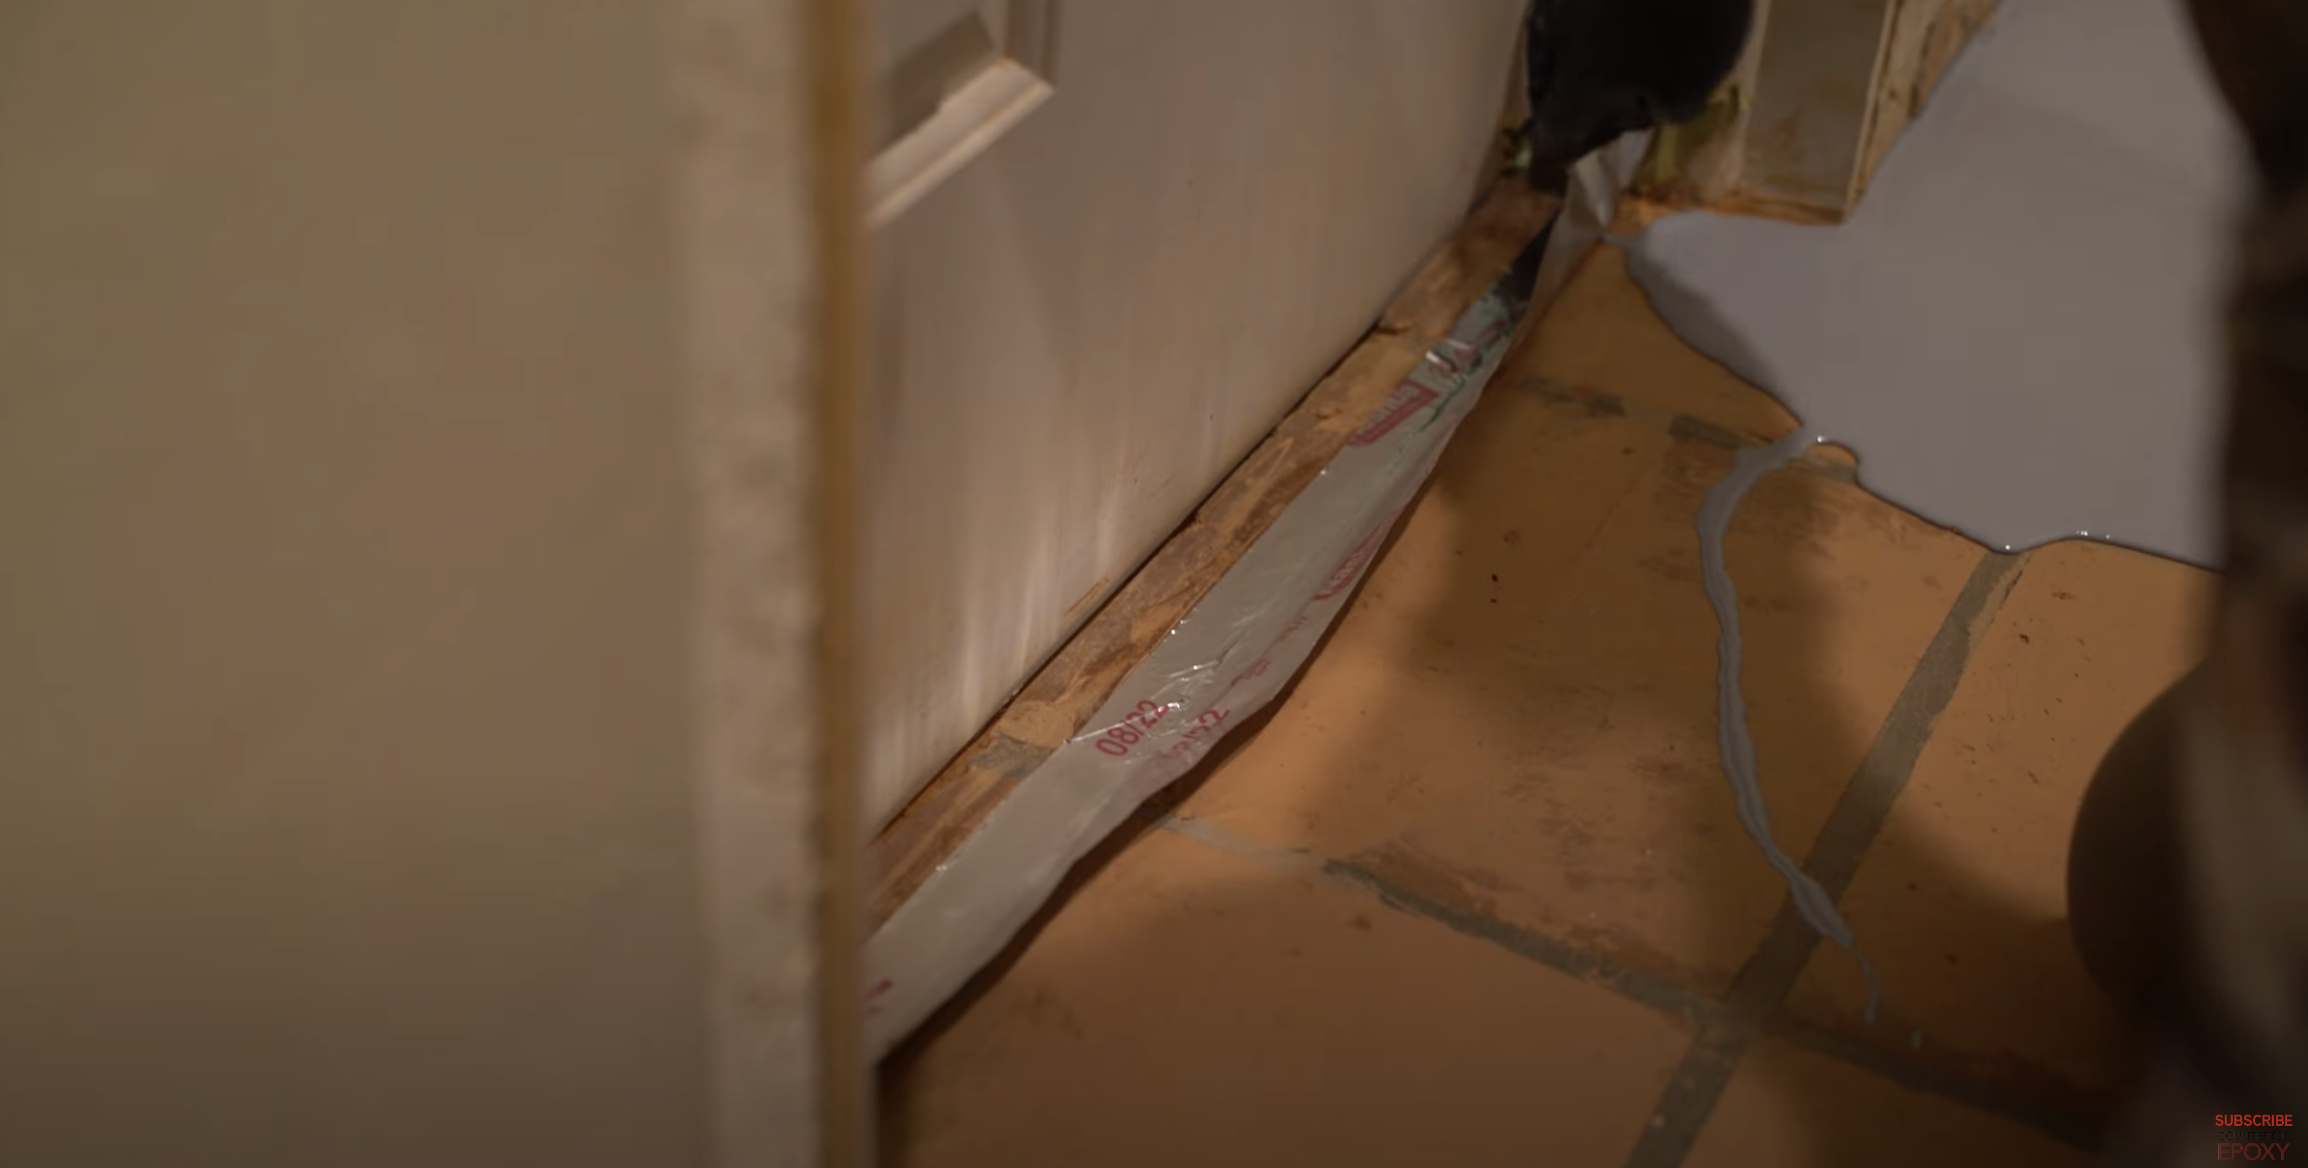
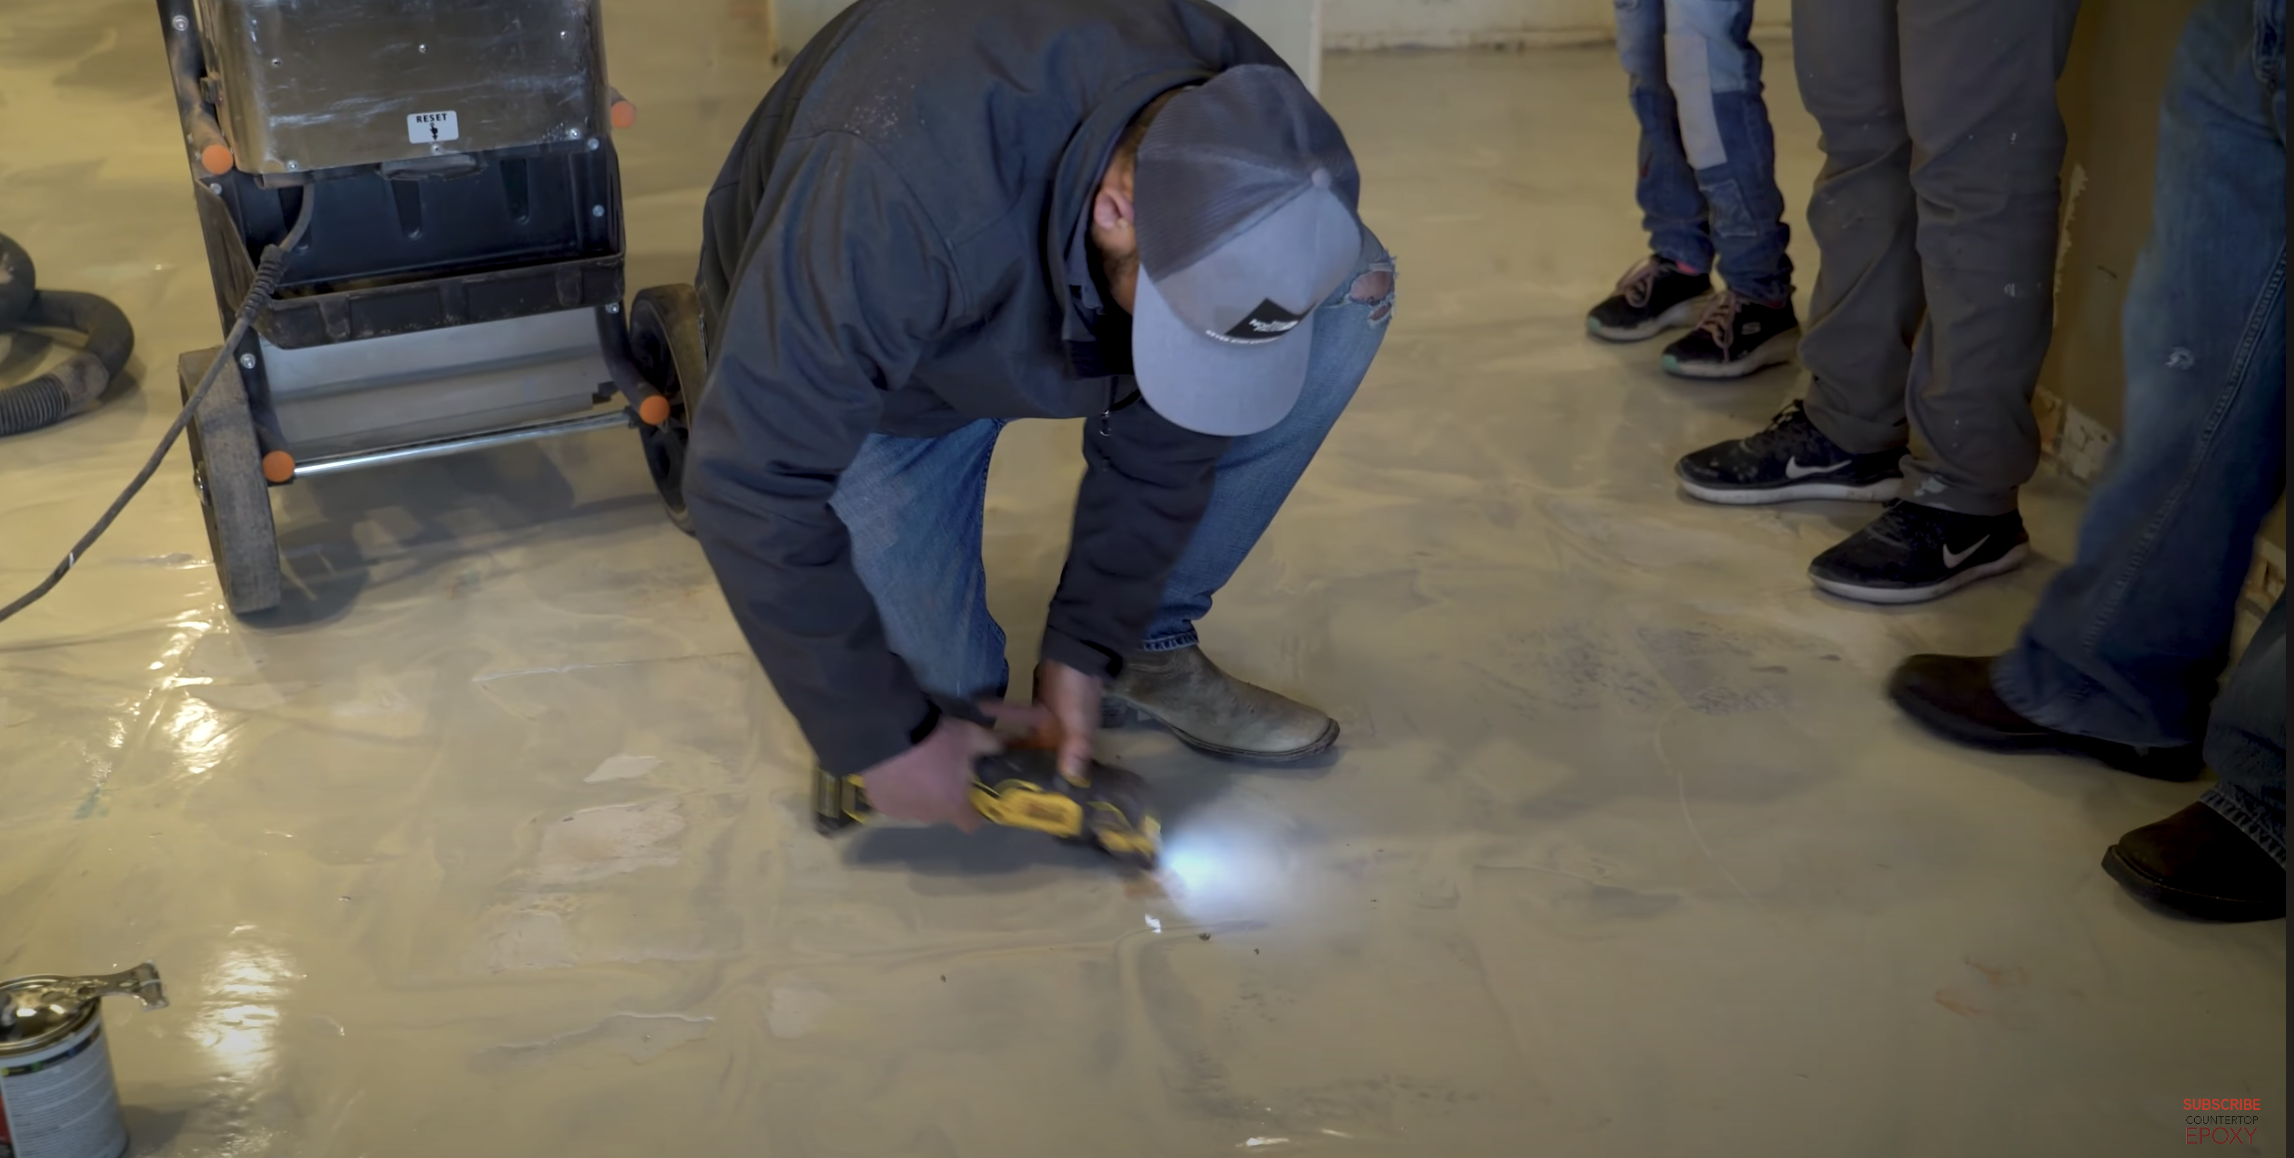
There were a few areas around the bottom of the wall where the base plate was not connected or there was damage to the concrete and we just used spray foam to spray underneath the actual base plate or in those damaged areas to fill those voids. And then we just cut it off flat prior to priming and epoxying our floor.
We did come back the next day and grind a few little high areas that were still protruding through and fill a few little low areas that had settled back in and fix a few fractures. But for the most part, it was quite a bit easier for the second day than it was the first.
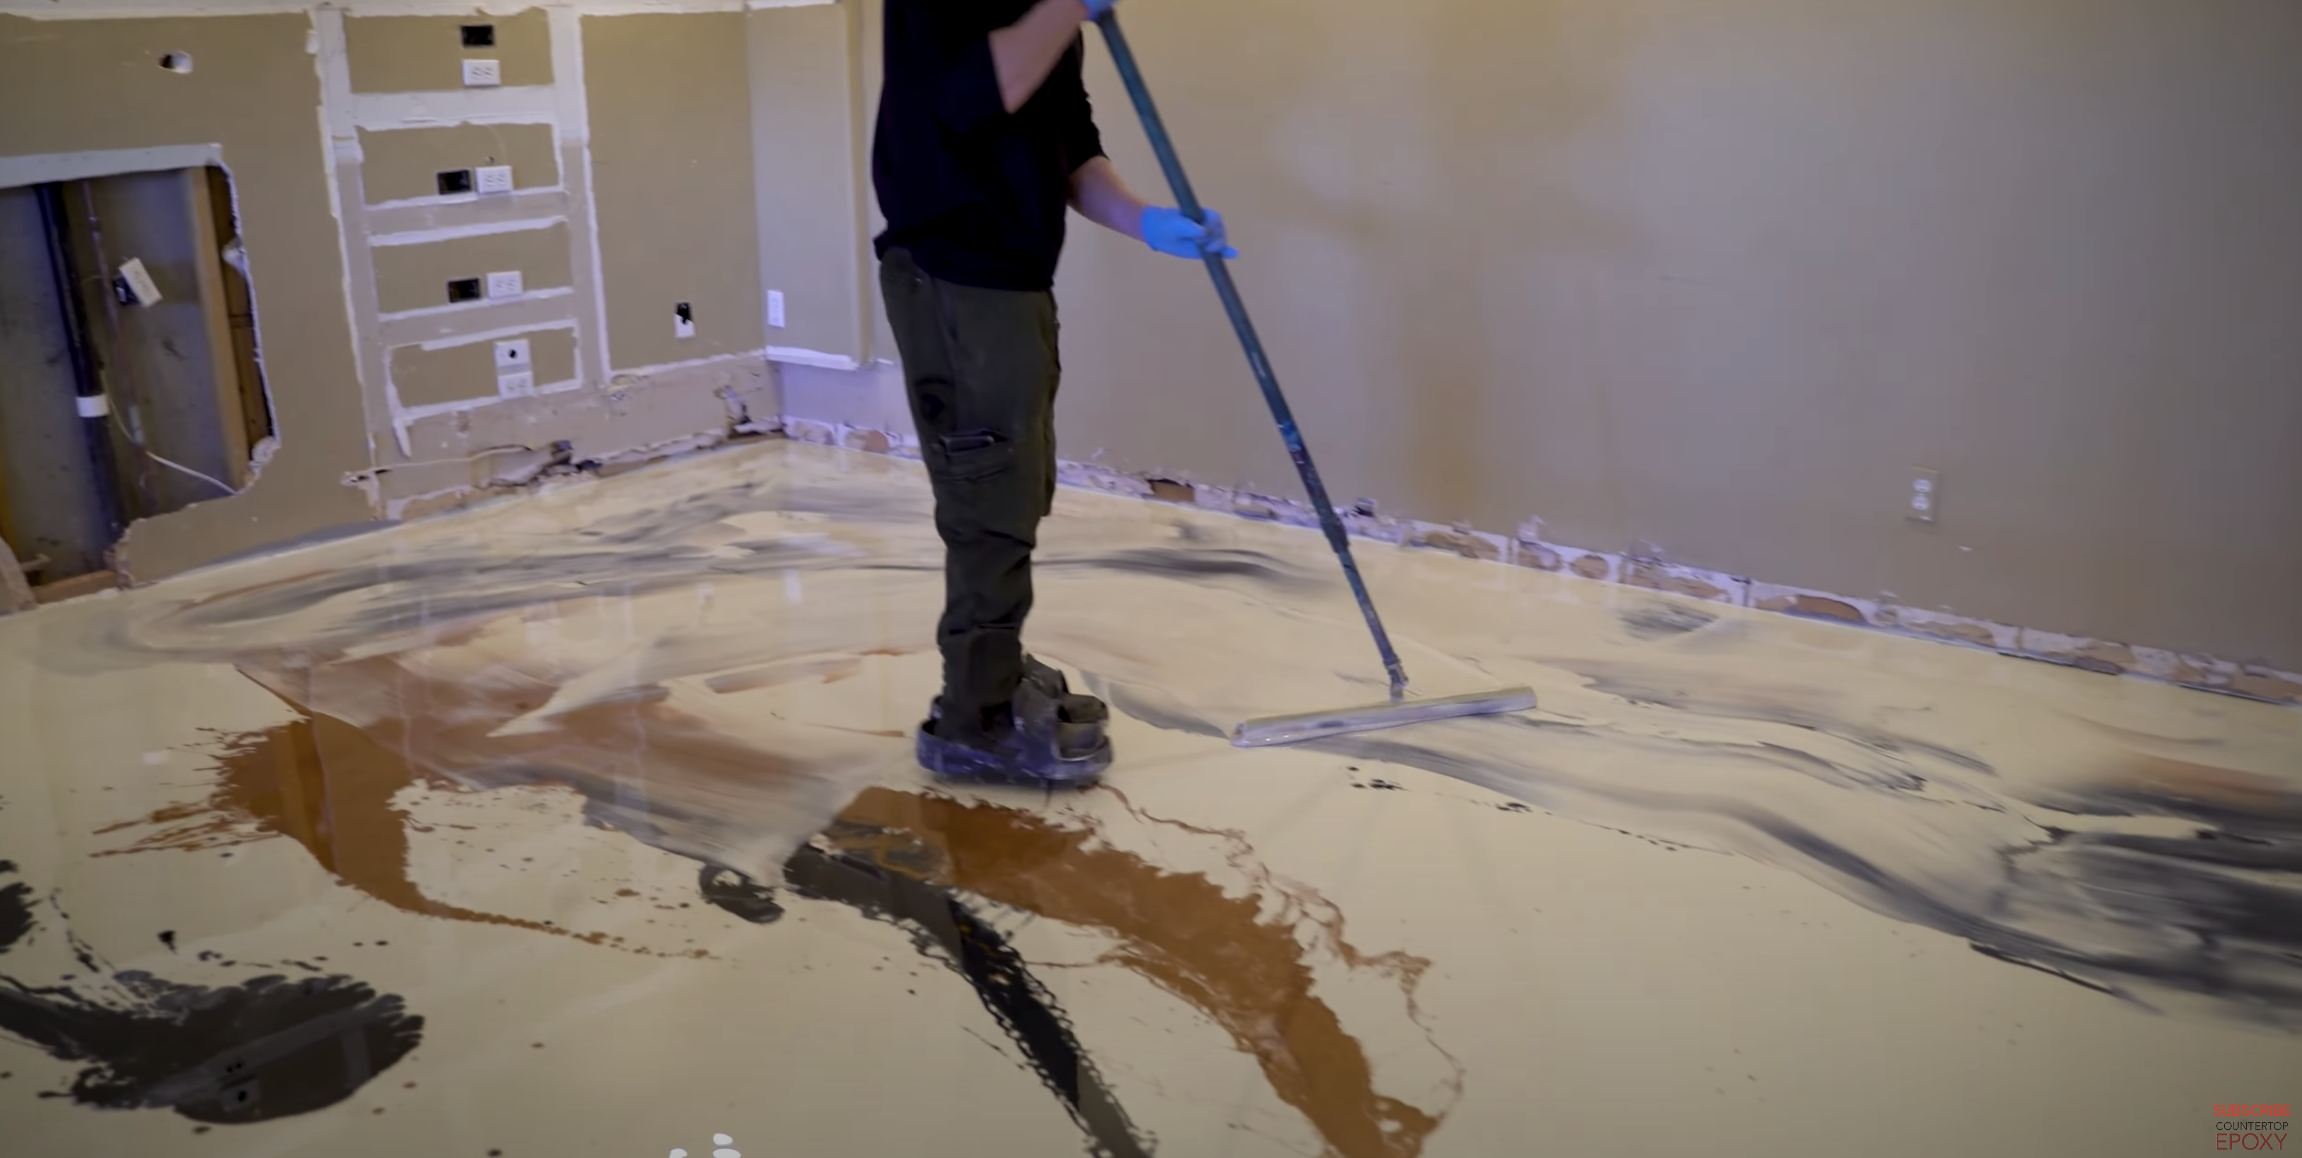
We used FX Gloss Epoxy Flooring for our main flood coat and we poured a full flood coat of almond. As long as you're organized and you get your main flood coat down in around an hour. You can still have adequate time to go back and quickly make some accent colors and pour them on top and spread them. It's important not to leave the product in the bucket for any extended period of time. This will allow you plenty of adequate working time on your floor. I just remember that wall floor and then all I do is let's get work on our wallets. Now we mixed most of our colors into epoxy and poured them on top of our flood coat.
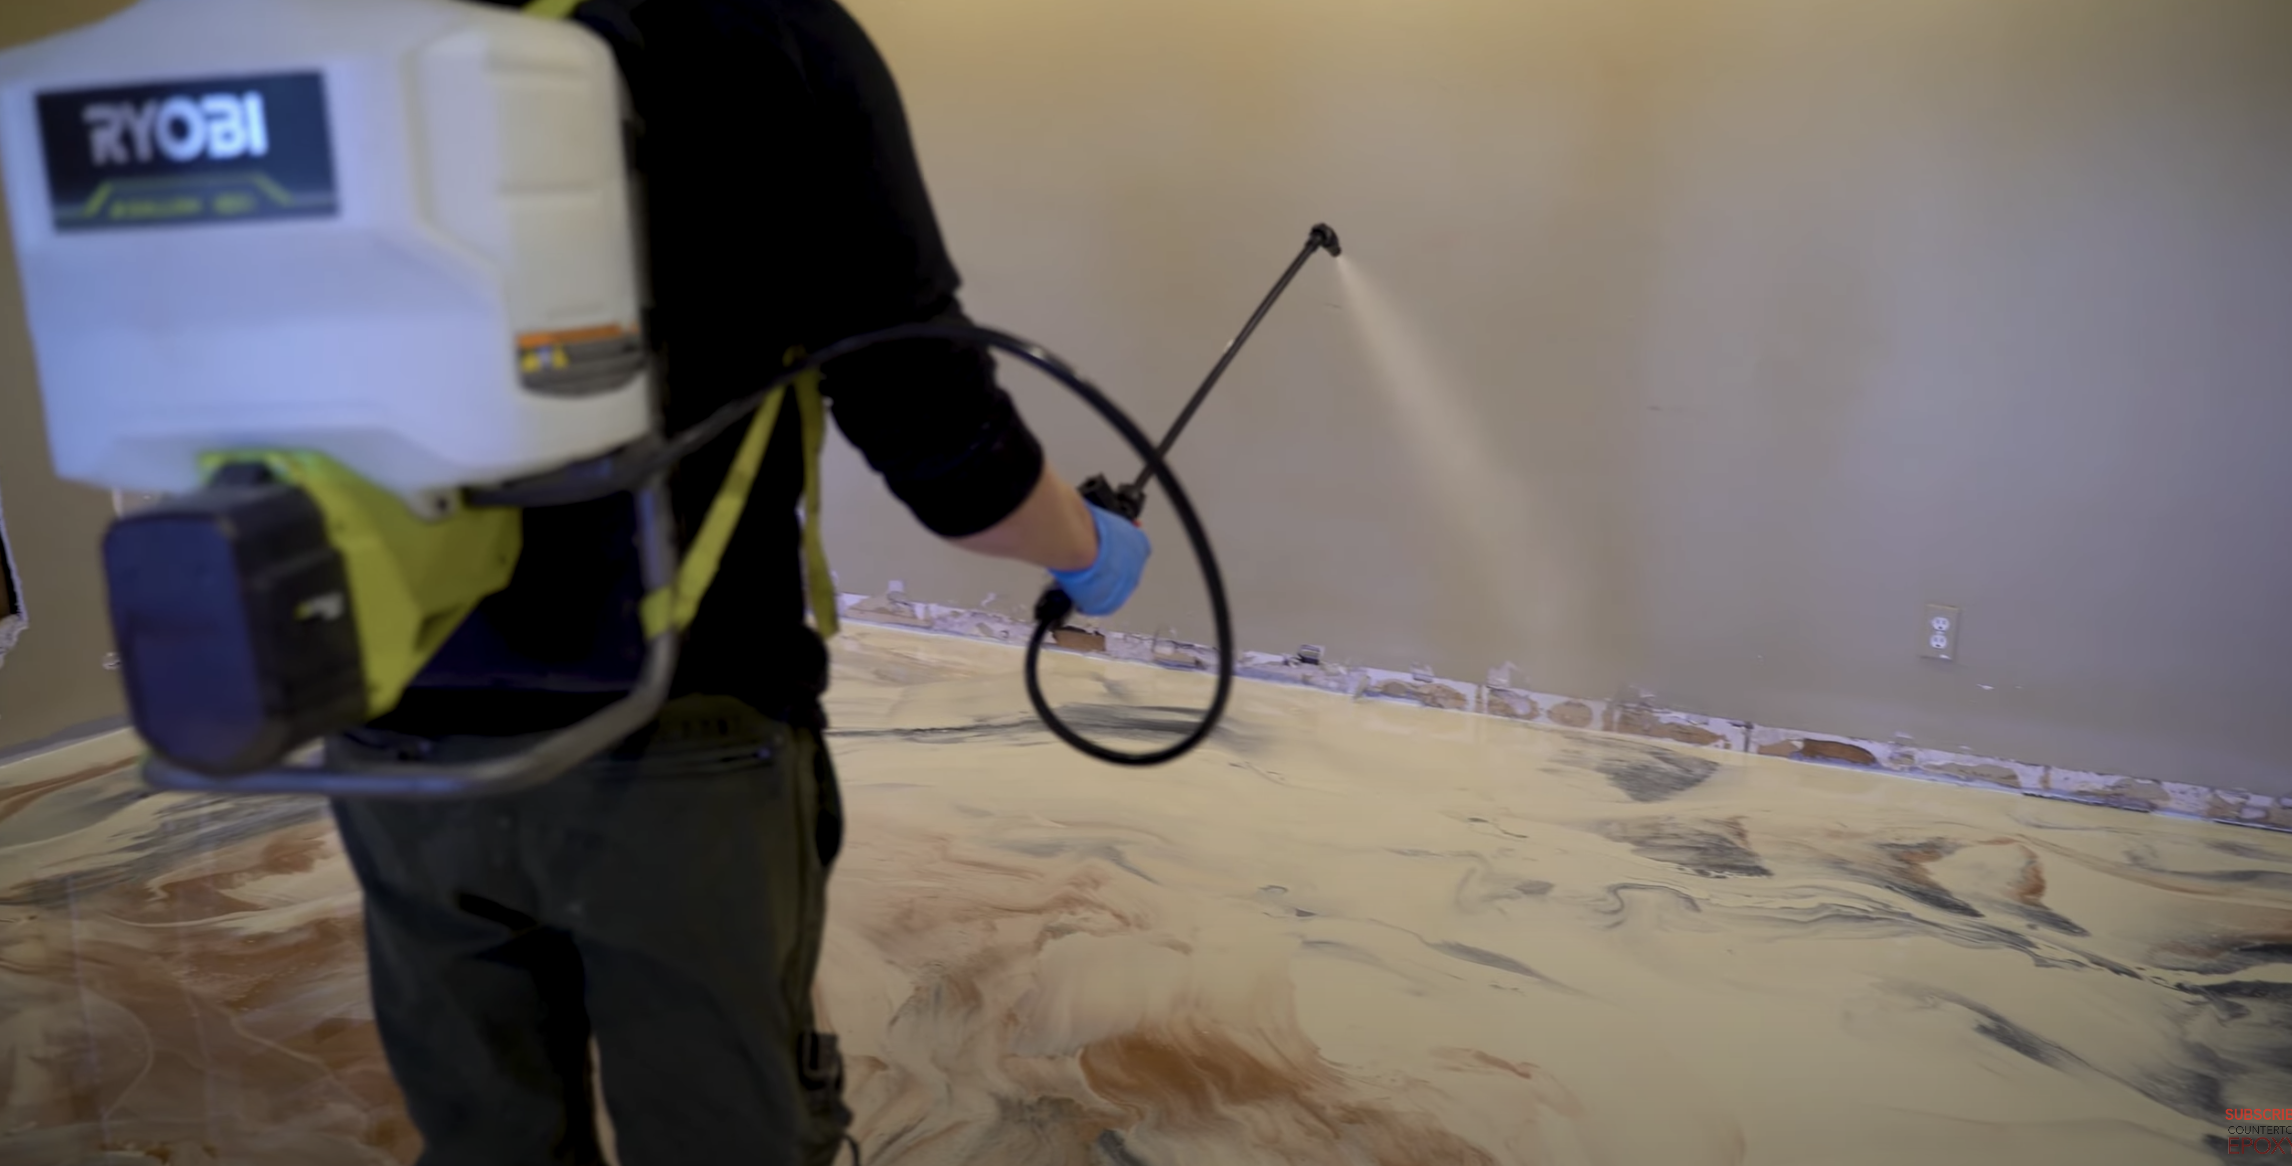
The final thing I did was try to carefully walk into the floor without tracking through too much of my pattern on my spike shoes and I sprayed using a backpack spray and 99% Isopropyl alcohol just to level out the floor. It really helps pop all the little air bubbles and it helps break the surface tension and make the product really self-level and flow to where it wants to go. Remember you never use a torch on the floor. We only use alcohol.
We sprayed our Gold Metallic Powder using a spray bottle and 99% isopropyl alcohol.
To learn more or purchase product, please visit our website https://www.countertopepoxy.com/ or give us a call at 970-639-9338.