

You can create your own butcher block countertop easily using epoxy. In this tutorial, you will learn how to build a butcher block countertop, as well as add metallic epoxy to add one of a kind color to the surface.
This example butcher block countertop took two days to complete.
Step One: Building Your Butcher Block Countertop
When choosing the wood at your local store, you will want to be sure to select boards that are already two to three different sheets of wood attached to each other. At Lowes we were able to get planks that had three sheets of wood. We chose a poplar and oak combination for our butcher block.
We then took our wood and cut it into smaller blocks. There were some of the blocks that we purposefully cut half the size as the majority of blocks to create “pockets” in the surface so they could be filled using epoxy to create a metallic “block”.
After we cut our pieces, we arranged them into the table top shape. Then we mixed one quart of epoxy over the surface and worked it in using a foam roller. This epoxy will act as the glue to hold the entire piece together. Once you finish with working the epoxy into every nook and cranny. You will then torch the surface and spray 91% isopropyl alcohol to ensure that there are no bubbles in the coat.
You will then let your board cure for at least three hours before sanding the epoxy off of the surface to smooth out imperfections and also clear the surface so you can treat the wood with linseed oil. We found that using a buffer with a sanding disc worked the best for this process, however, an orbital hand sander should also work for this project.

Step Two: Adding Metallic Pigments to Your Butcher Block Countertop
Once the oil penetrates the wood, you can begin to add metallic colored epoxy to your butcher block. For our table top we mixed one quart of turquoise epoxy and two quarts of the metallic gold epoxy. The turquoise and gold were then troweled into the wood pockets we created.
The next day the surface was sanded once more to remove the epoxy from the surface so that the colors were only in their specific metallic epoxy blocks. Finishing with the buffer with a sanding pad again gave the surface a smooth finish.
Step Three: Sealing the Butcher Block with Epoxy
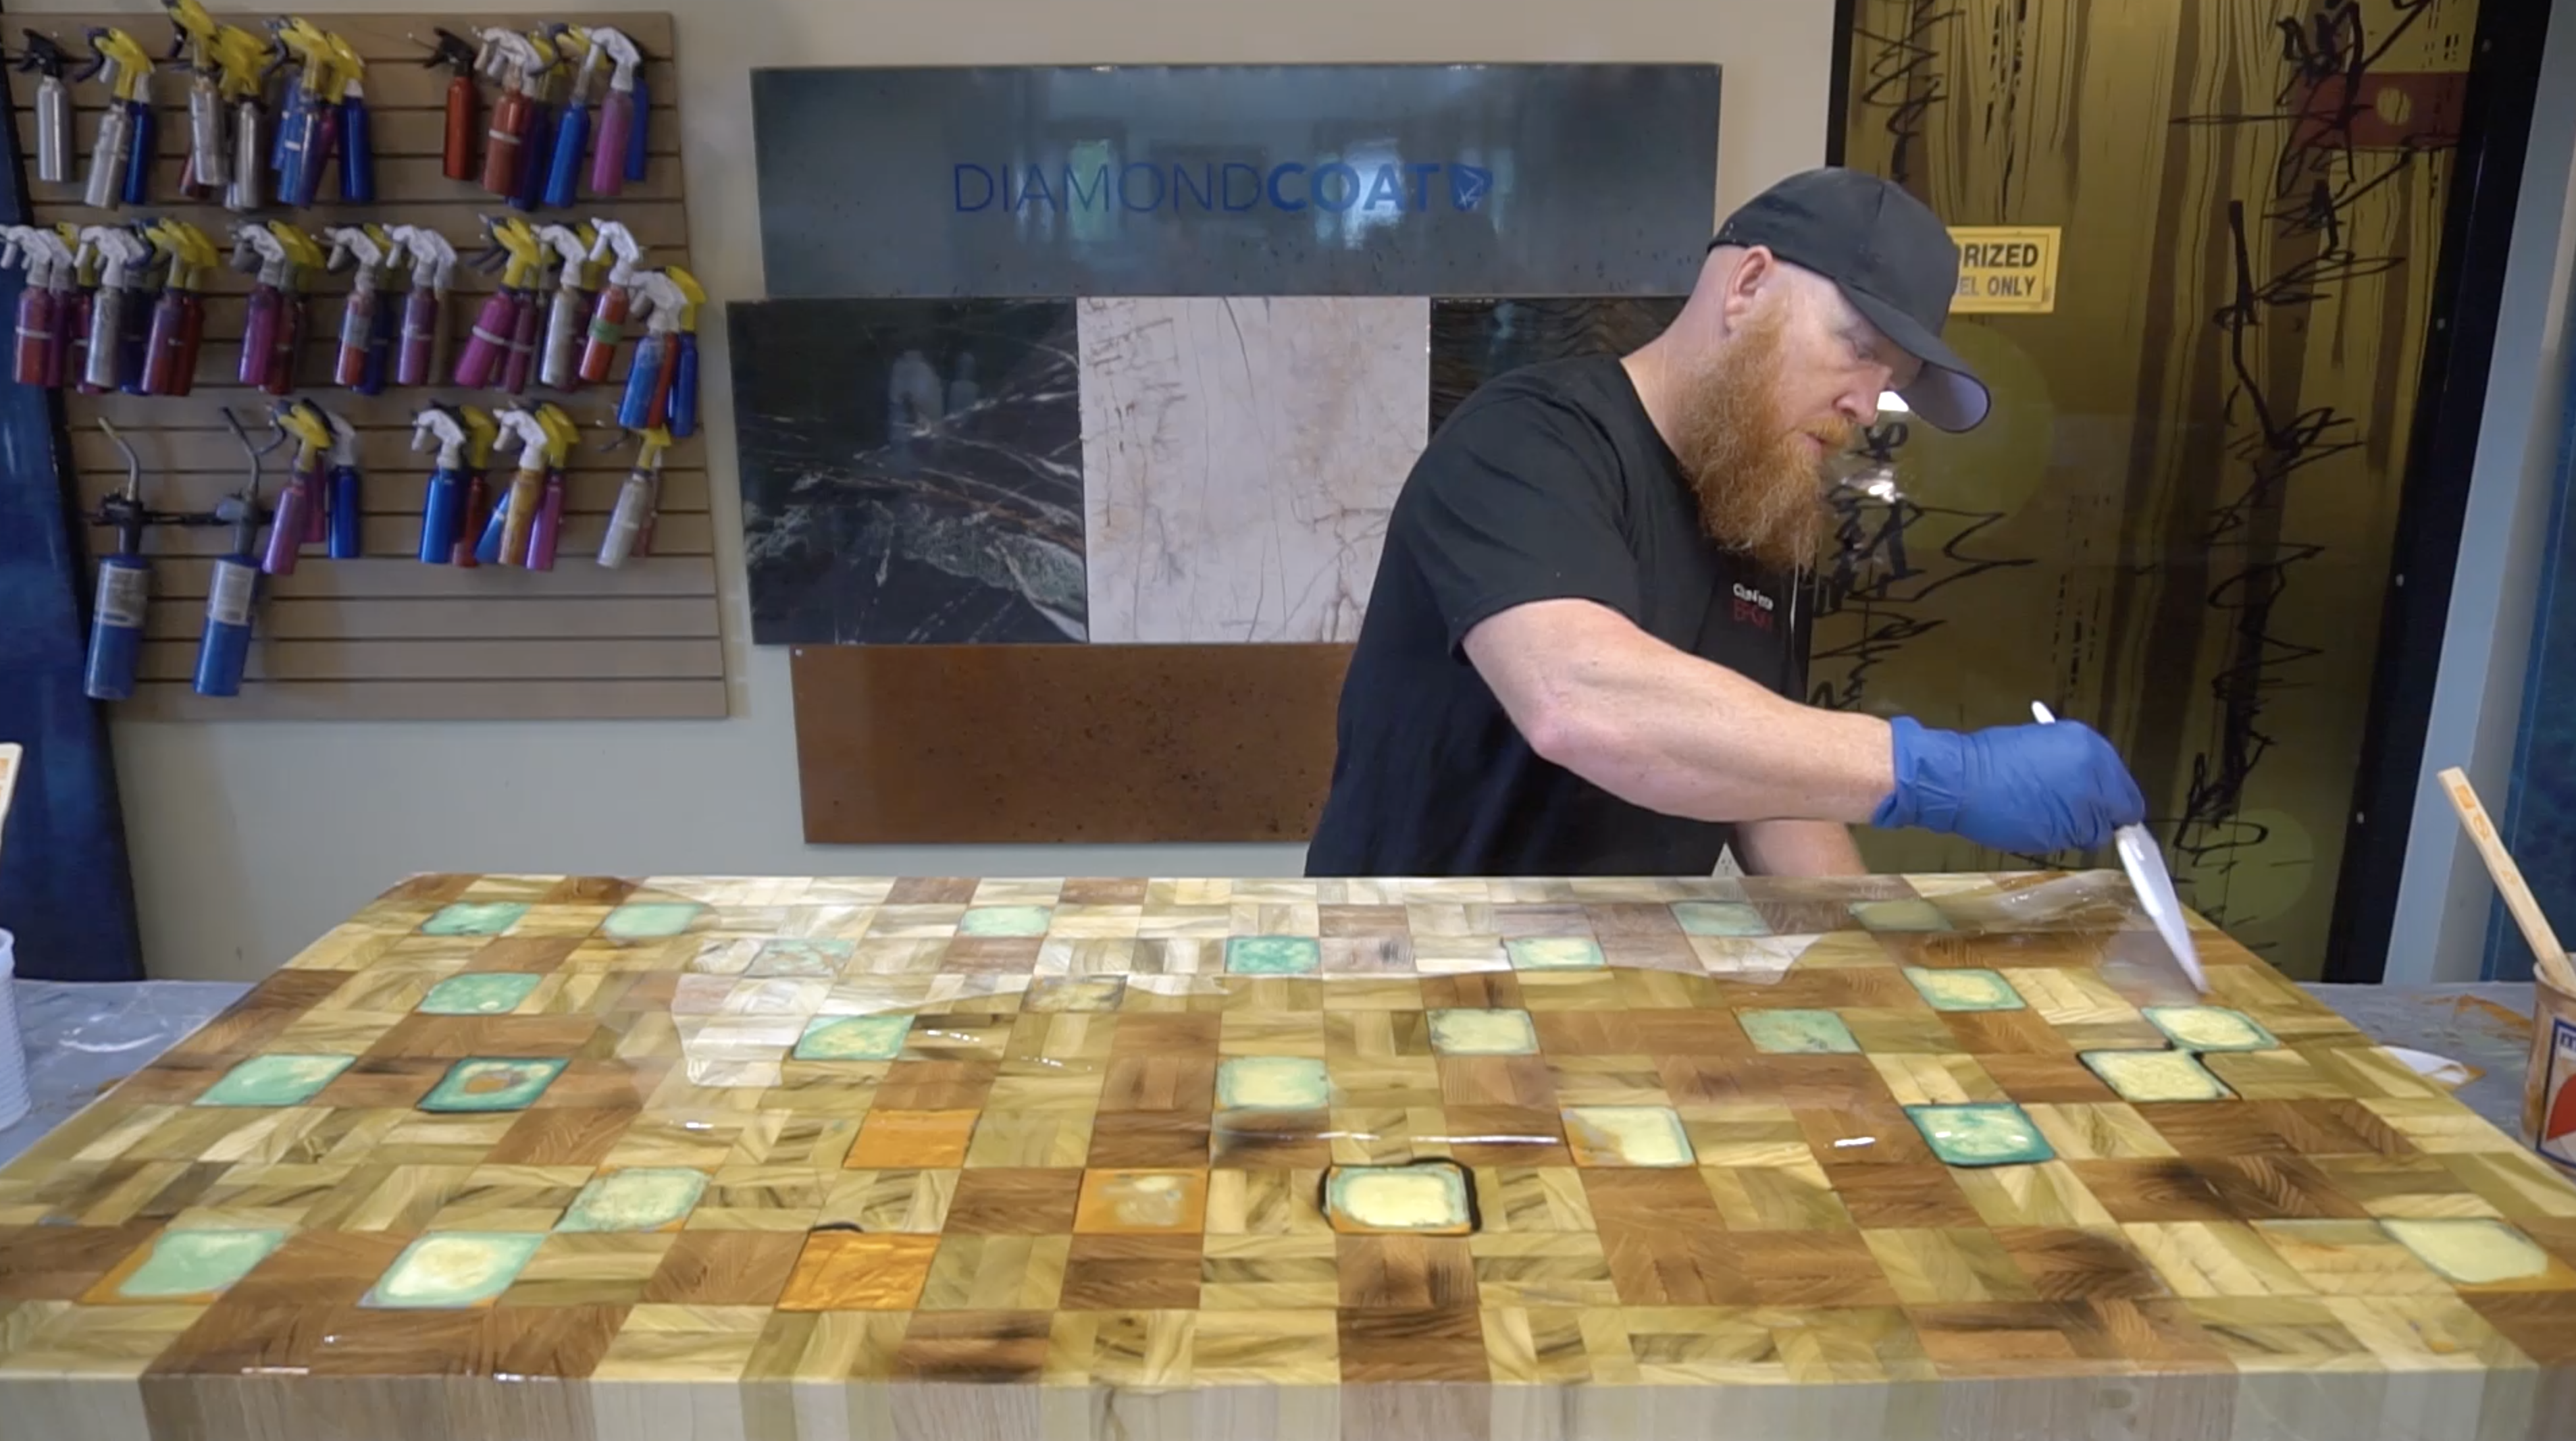
Before applying the final skim coat of clear epoxy to the butcher block you should use 91% isopropyl alcohol to clean off remaining oil or debris left on the surface. Once the surface is clean, you are ready for your skim coat. For a skim coat of epoxy 1 quart will cover 60 square feet. On our countertop we mixed 16 oz which was more then enough to seal the surface.
The reason you skim coat wood, concrete, and other porous surfaces before a flood coat of epoxy is to seal the surface so it does not allow air bubbles into your thick epoxy coat. After pouring the epoxy onto the worktop, you will use a trowel or a squeegee to work the product back and forth on the countertop. Be sure to allow the product cascade off of the sides so that your edges are sealed as well.
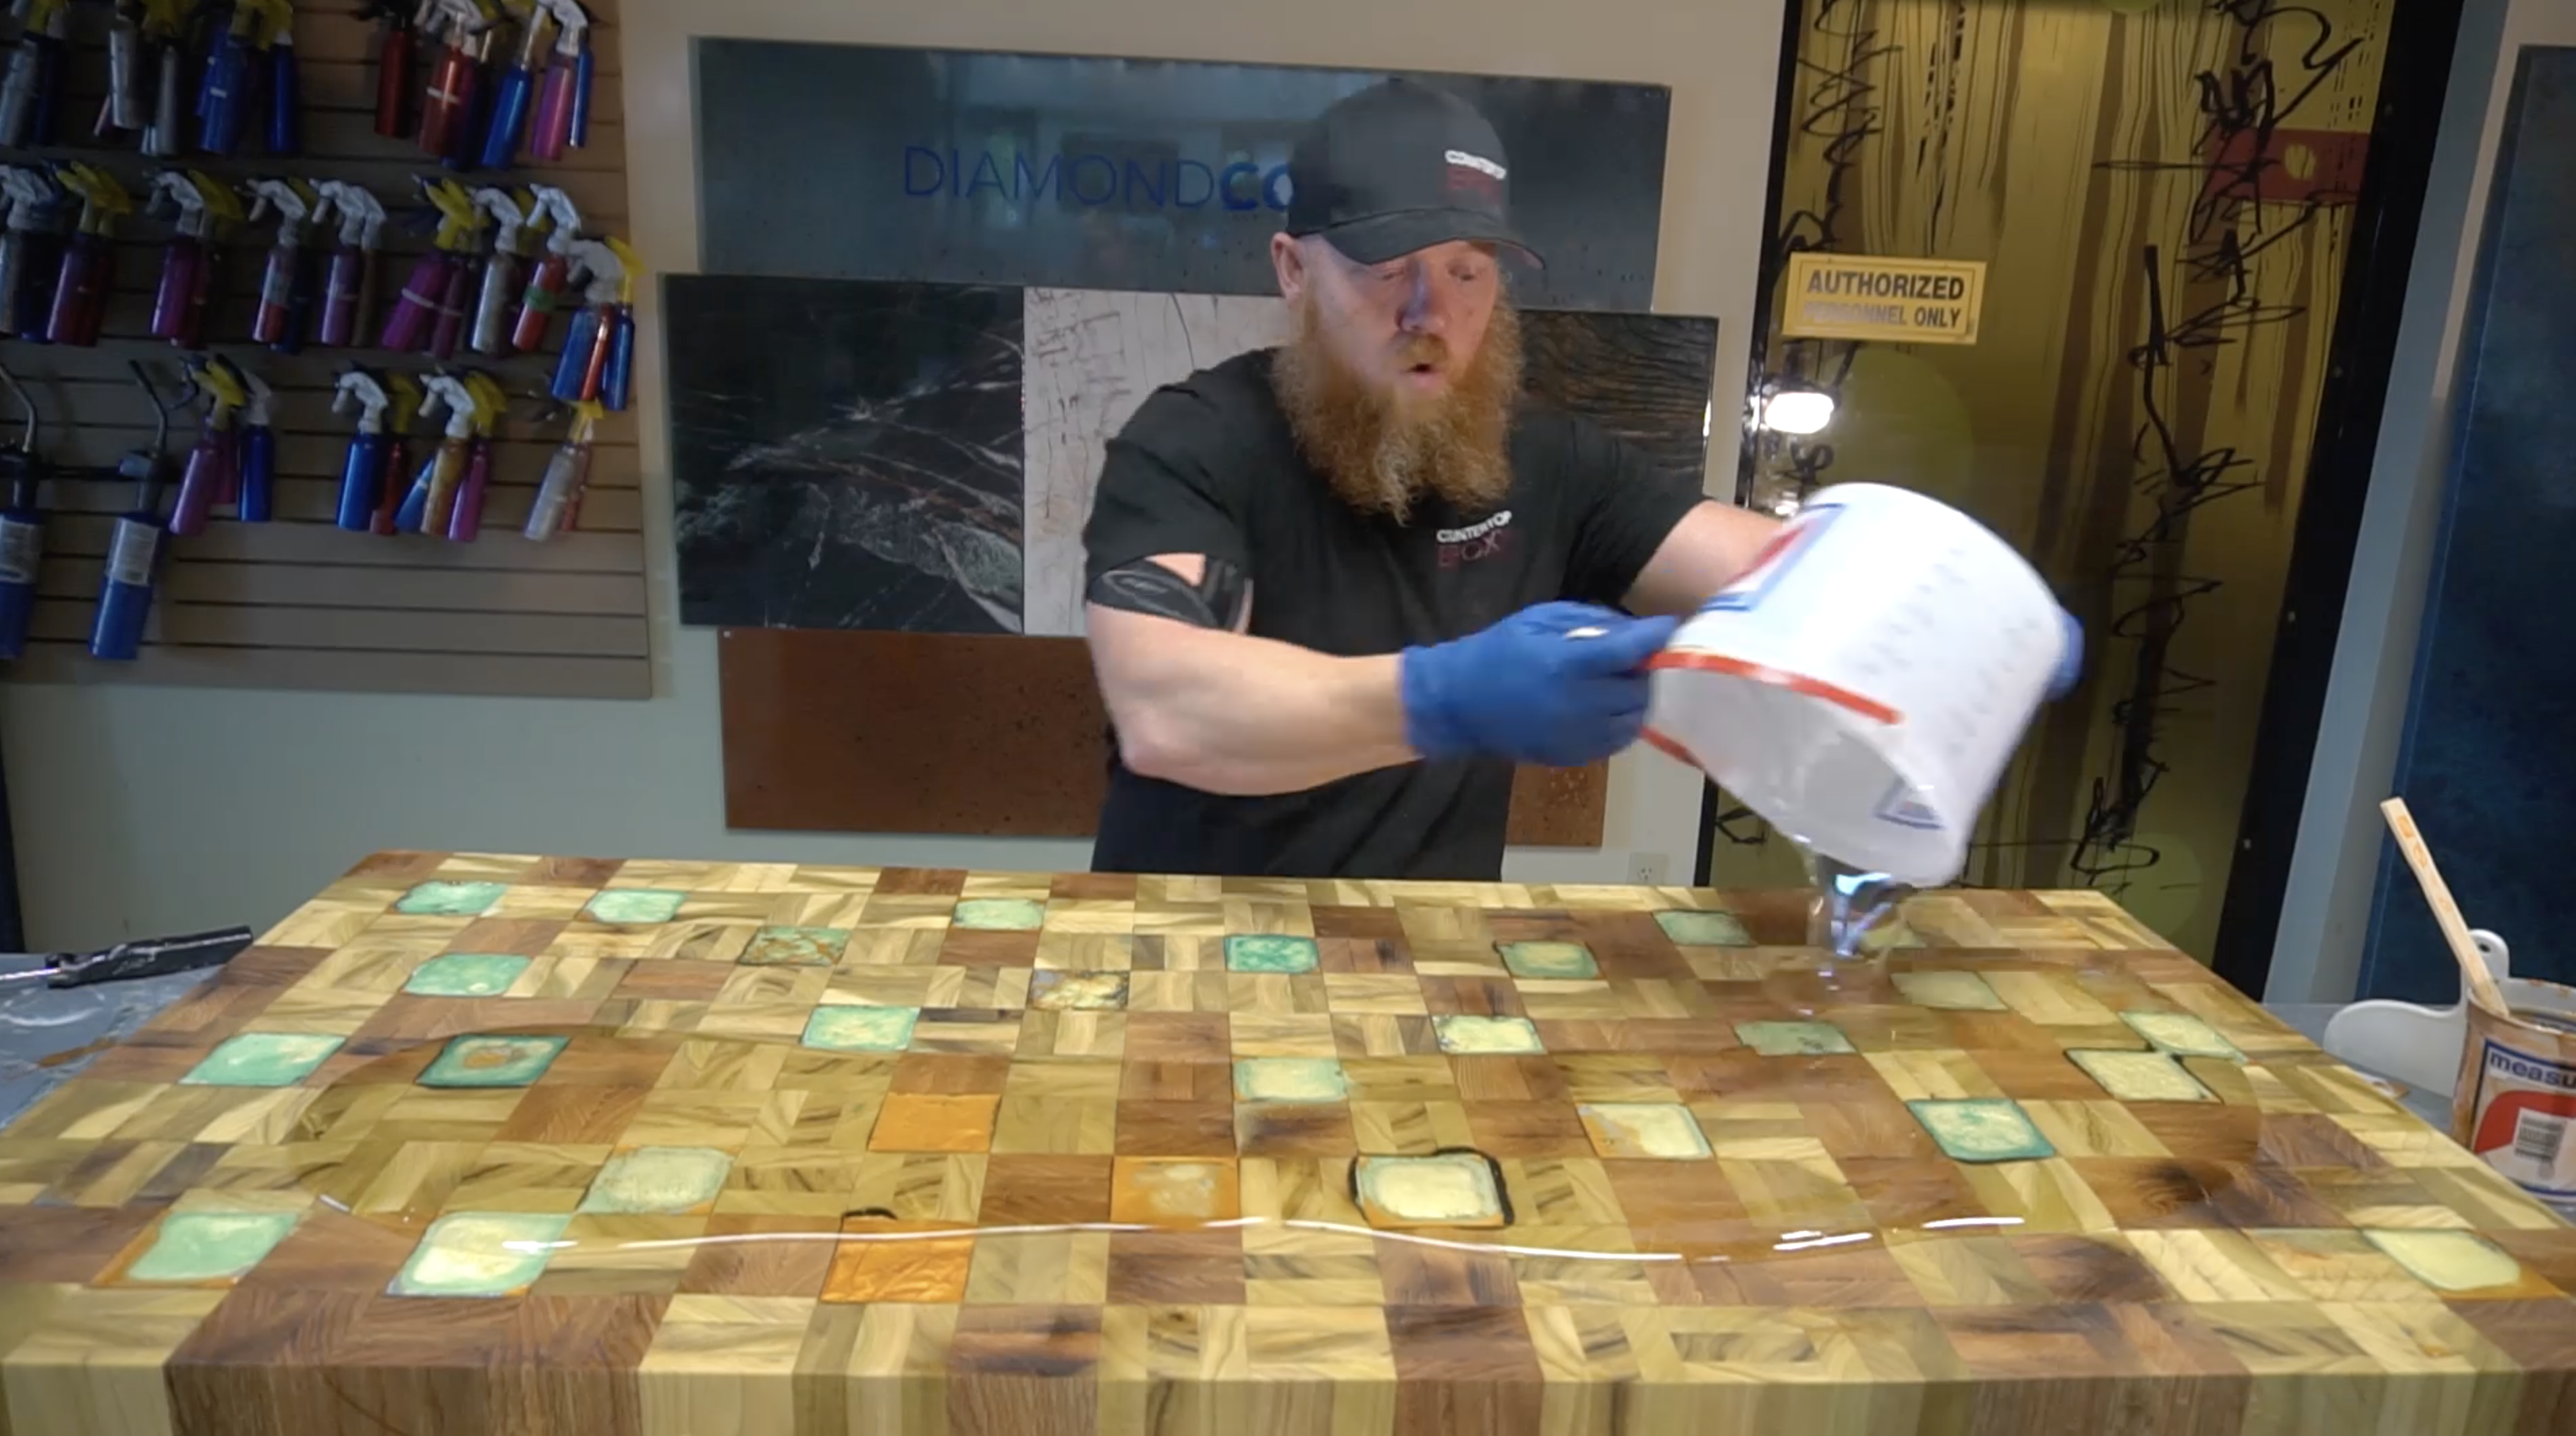
Step Four: Applying the Flood Coat to the Butcher Block
3 hours after skim coating the butcher block you can continue with a flood coat to create a high shine finish. Or if you would prefer a satin finish you can stop after the flood coat. This skim coat will seal your wood against any food materials soaking into the surface and molding.
One gallon of epoxy will cover 20 square feet, so a half gallon kit will most likely cover your project. To prevent air bubbles, make sure to torch the surface after you pour and then wait for 30 minutes before running a torch over the countertop again to remove any additional air bubbles that come to the surface.
Do you have any questions about how to create your epoxy furniture? Call our support team to get assistance for your project. We are happy to be of service!