

While our Premium Clear FX Poxy can go over just about any surface, it’s extremely important to know the proper preparation needed for your substrate before applying the product. Be Laminate/Formica, granite or tile countertops, each requires proper preparation to ensure adhesion and achieve that flawless finish.
The five most popular countertops our customers resurface are Laminate, Formica, Granite, Concrete, Wood and tile countertops.
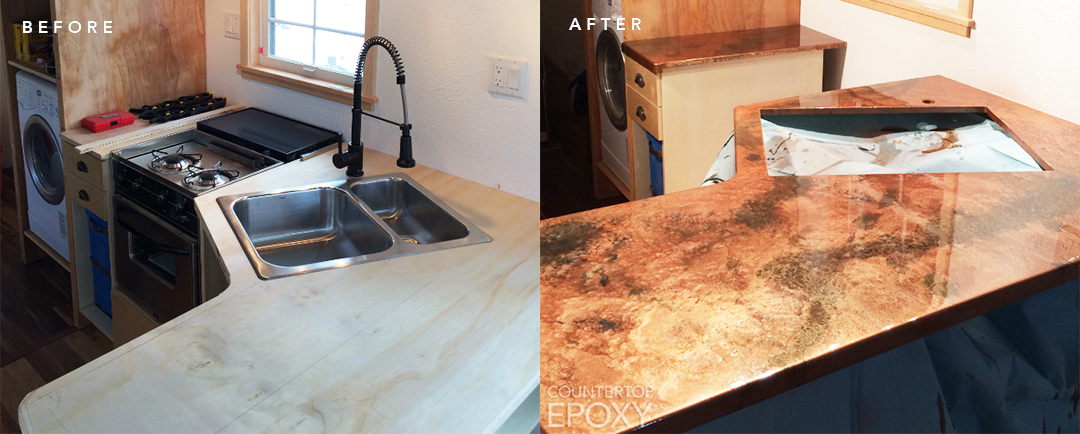
Laminate/Formica

Laminate countertops and Formica, which is a brand name of laminate countertops, are made from layers of plastic that are bonded to particle board or Kraft paper to create a solid countertop surface.
Preparation:
Our Premium Clear FX Poxy can be poured directly over this substrate without any extensive preparation. The recommended prep is to ensure the surface is thoroughly cleaned of any debris, dust or oils. Specially a countertop which encounters constant cooking and heavy daily use, making sure any oil residue is thoroughly cleaned off is vital. If any dust, debris, oil (or silicone) residue is left behind, it can result in the epoxy not adhering properly in certain areas resulting in fish eyes, divots or areas where the epoxy will not flow or adhere. To ensure no residue is left on the surface we would recommend cleaning your surface with 91% isopropyl alcohol.
Granite, Concrete, Wood Countertops
Granite, concrete and wood are porous substrates that require an additional step before epoxy application.
Preparation:
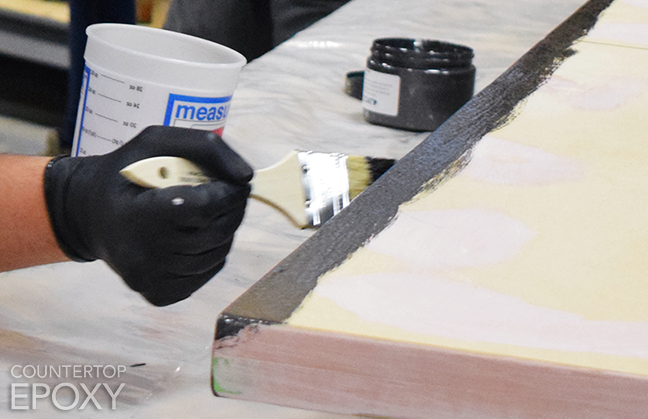
To properly prepare a porous surface for epoxy application,
it is recommended to thoroughly clean the surface and seal it by skim coating. Skim coating seals the surface and
prevents your substrate from soaking up the epoxy and air bubbles from forming
during your flood pour. The skim coat is a very thin layer of epoxy that you’ll
apply to your entire surface and can be applied with a brush or spread out with
a squeegee. For an average countertop (40-50 sq. ft) it usually takes less than
a quart of epoxy to apply, as you’re just ensuring it’s thinly coated to seal
in the substrate. Once the skim coat is applied, let it cure for at least 6
hours minimum. When no longer tacky you are ready to apply your flood pour of
epoxy.
*Depending on porosity of the surface, may require a few skim coats to thoroughly
seal.
Tile Countertops
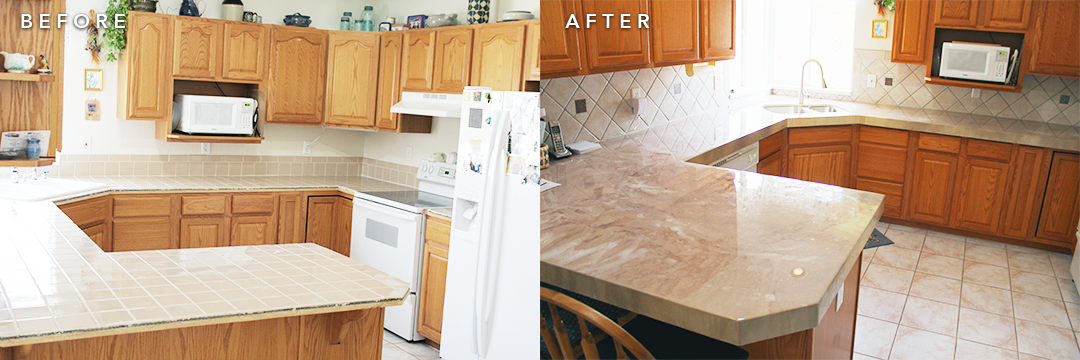
With tile countertops comes grout lines. Grout lines are extremely porous and it’s necessary to seal them in before epoxy application. If not properly sealed, the grout lines can soak up the epoxy and result in grout line impressions. Tile can also be porous and may have had a previous sealant applied that the epoxy may not react well to, thoroughly cleaning the tile countertop surface with 91% isopropyl alcohol is recommended before application to remove any residue.
Preparation:
To properly prepare tile countertops, you’ll want to thoroughly clean the surface with 91% isopropyl alcohol and apply a skim coat to the entire surface, primarily focusing on the grout lines. Depending on porosity, it may require a few skim coats. As mentioned previously, once the skim coat is applied, let it cure for 6 hours minimum and when no longer tacky you are ready to apply your flood pour.
You may have a question after reading the preparation and thinking “Do I need to sand the surface?”
Sanding is not a requirement for surface preparation, however you can rough it up a bit by lightly sanding the surface with 220-320 grit sand paper to further ensure adhesion of our product. Specially in cases where there was a previous sealant applied. In other terms, taking that extra step to sand the surface won’t hurt.
Another question you may have is about priming the countertop. Priming the countertop is not necessary. The only priming we’d recommend is when you’re applying epoxy with a base color drastically different from your substrate. You’ll want to prime just the vertical edges with the same FX Prime Coat Color that you’d use for your base color with the epoxy. The epoxy will naturally pull thinner on the edges and this step ensures no underlying color will peak through.
When priming your edges, you do want to make sure the primed edge is completely dry before pouring your epoxy.
When going into your next epoxy countertop resurface, consider the surface preparation you’ll need. It truly can make a difference between an application succeeding or failing.
We would also highly recommend reading our previous blog posts for more informative tips to help you along with your epoxy application.
Vertical Edges and Surface Coating Tips
The 5 Most Common Mistakes DIYers Make When Installing Epoxy Countertops
How to Properly Torch Your Epoxy Countertop
Also check out our informative YouTube tutorial video covering the epoxy
application process:
How To: Epoxy Kitchen Countertop
If unsure about a certain countertop and the preparation needed, please give our office a call and we'll be more than happy to assist you with your questions. 970.639.9338 Our office hours are Monday through Friday, 8am to 6pm Mountain Standard Time.